Employees Check-In/Out on ZenHR’s Website and Mobile App
TABLE OF CONTENTS
- Employees Check-In/Out on ZenHR’s Website and Mobile App
- How to Activate ZenHR’s Feature “Employees Check-In/Out using ZenHR’s website and Mobile App
- How to Assign a Work Location to all of your Employees
- How to Assign a Work Location to Specific Employees
- How to Delete a Work Location that Was Previously Assigned to an Employee
- How Employees Can Clock In/Out through the Dashboard on ZenHR Website
- How Employees Can Clock In/Out through ZenHR’s Mobile App
- Employees and Subordinates Attendance Records
How to Activate ZenHR’s Feature “Employees Check-In/Out using ZenHR’s website and Mobile App
To activate this feature, follow the below steps:
User Menu à System Preferencesà Attendance and Time-Tracking à Geolocations
Through this page, HR admins will be able to add different work locations to manage their employees’ check-in/out transactions based on the allowed geolocations.

By clicking on the “Add” button, the below screen will appear:

Add the work location by selecting it from the map or by entering the latitude and longitude. Define the allowed check-in/out area by adding the radius in meters. Finally, choose if it’s a restricted work location or not.
*Note: If you chose a restricted work location, employees won’t be able to check in/out unless they exist in that specific location.
How to Assign a Work Location to all of your Employees
To assign or unassign the work location to all of your employees in the branch, click on the (+) sign as shown below:

How to Assign a Work Location to Specific Employees
Main Menu à Time Management à Employees Geolocations
The below page will appear:

Click on the “Add” button.

Select the employee “Name” and “Geolocation”, then click on “Create”.
How to Delete a Work Location that Was Previously Assigned to an Employee
Click on the (+) beside the employee name, then click on the “Delete” button as shown below:

How Employees Can Clock In/Out through the Dashboard on ZenHR Website
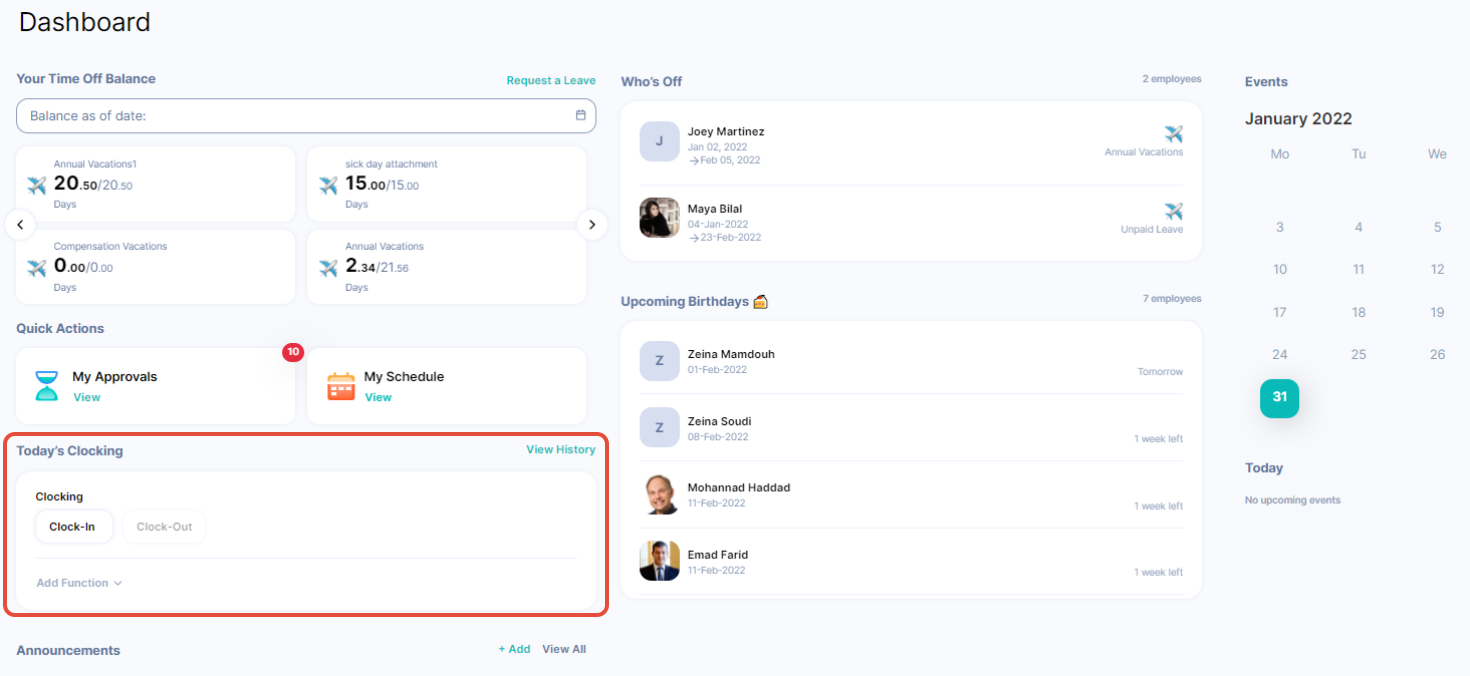
Employees can clock in through their dashboard once they arrive at the work location.

Once they clock in, their current location will appear in a map and they can confirm their location.

After confirming their location, employees need to click on the “Proceed” button. Now, 2 new buttons will appear to the employee: Clock Out button and Attendance Actions button that allows them to submit any other actions during the day such as lunch and smoking breaks.
How Employees Can Clock In/Out through ZenHR’s Mobile App
Employees can also clock in/out from their accounts on the mobile application.
By clicking on the “Attendance” button on the homepage, all the action buttons will automatically appear as shown below.


Employees and Subordinates Attendance Records
The mobile app allows employees to check their attendance record history and allows managers to check their subordinates’ record history, through the “Attendance History” and “Subordinates History” pages.
By clicking on each record, employees/managers will be able to check all the attendance details of the selected date for themselves and their subordinates.

