Job Offer Approval Cycle
The Job Offer Approval Cycle adds a formal review step to the job offer process in ZenATS. Instead of a recruiter creating and sending an offer letter on their own, the offer first goes to one or more designated approvers, such as a department head, HR lead, or finance manager, who must sign off before it's sent to the candidate.
In practice, this means: a recruiter fills out a short offer form (job title, salary, start date, and other key details), the form is routed automatically to the right approvers in the right order, and only once everyone has approved does the offer become ready to send. Every step, who requested it, who approved or rejected it, and when, is tracked automatically, so nothing gets lost in email threads or verbal approvals.
This guide covers how to set up approval cycles, how to generate an offer, and what each role- requester, approver, and action taker needs to do.
Note: This feature is only available to customers on the Advanced tier of ZenATS.
Step 1: Set Up an Approval Cycle (Department Level)
Before anyone can request offer approvals, an admin needs to create at least one approval cycle. Each cycle defines which offers it applies to (by branch, department, and vacancy level) and who needs to approve them.
Go to Main Menu → System Preferences → Company Settings → Approval Cycles.
Click Create Approval Cycle to open the setup form.
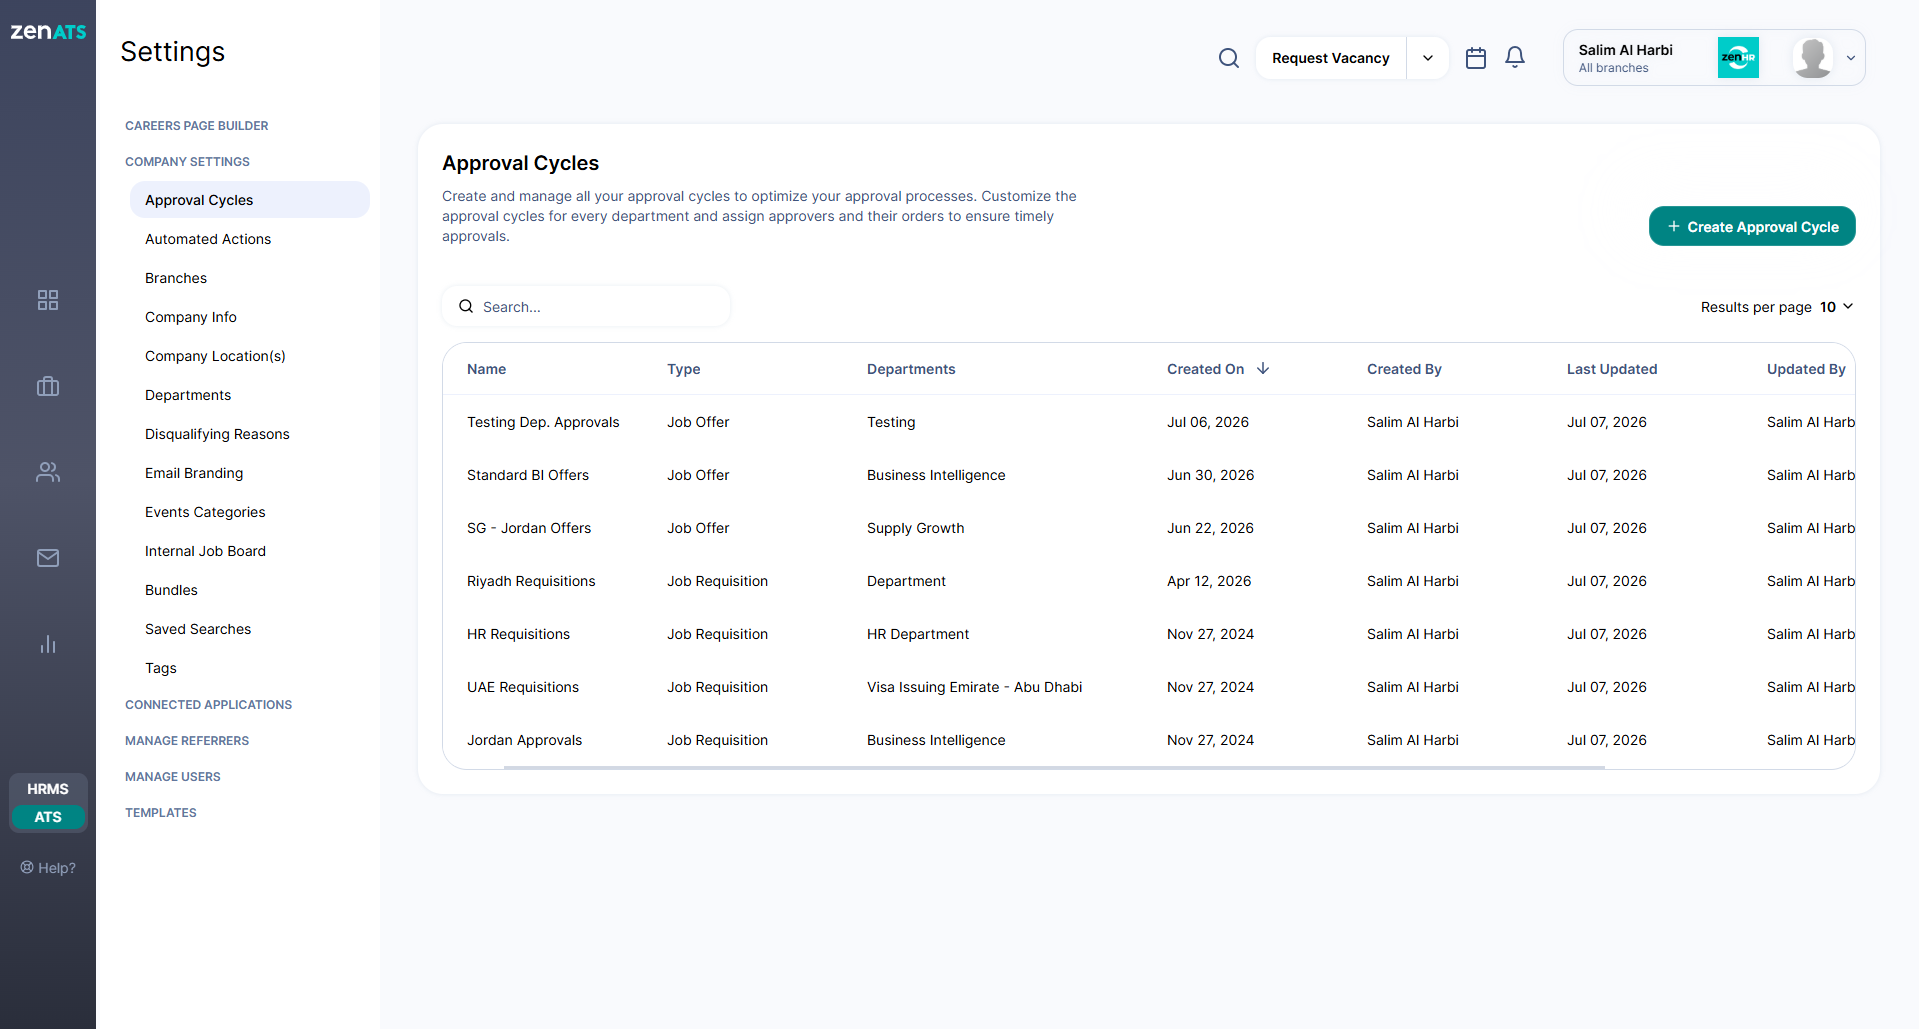
Fields to complete
Approval Cycle Name: A name that's easy to recognize later, e.g., "IT Department Job Offer Approval."
Transaction Type: Select Job Offer.
Branches: Choose which branch(es) this cycle applies to.
Departments: Choose which department(s), within the selected branches, this cycle applies to.
Approvers ("Approved by"): Add everyone who needs to approve the offer, then drag and drop to set the order they'll review it in.
Skip Approver After (optional): Set a number of days. If an approver doesn't respond in time, the request automatically moves on to the next approver, so offers don't stall.
Action Taker(s) - Recruiters: Choose who is allowed to compose and send the approved offer to the candidate after it’s fully approved.
Notifications: Add anyone who should be kept in the loop on approvals, rejections, or both, even if they aren't an approver.
Once everything is filled in, click “Create” to save the cycle.
Note: Editing a cycle later updates all future offers automatically, and you can choose to apply the change to offers already pending. You can only delete a cycle if it isn't currently in use.
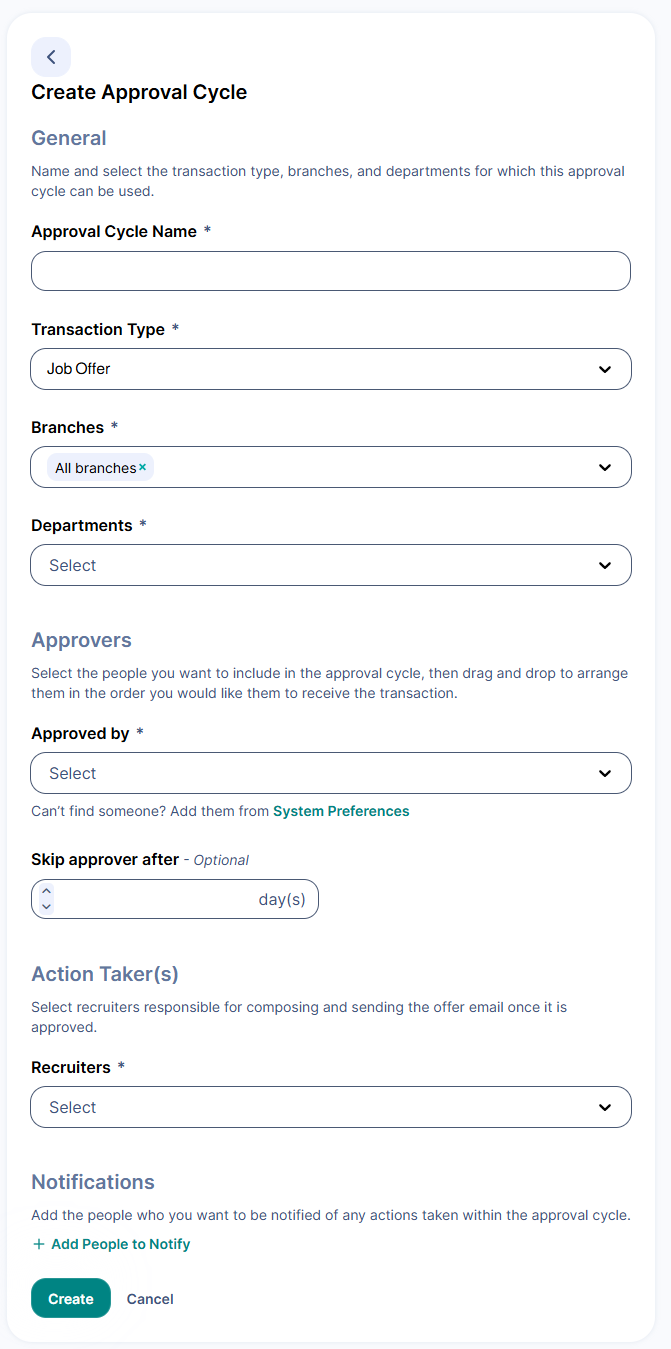
Step 2: Adjust the Approval Cycle for a Specific Vacancy (Optional)
By default, every offer follows the approval cycle set up for its department. If needed, you can turn the cycle on or off, or change the approvers, for one specific vacancy.
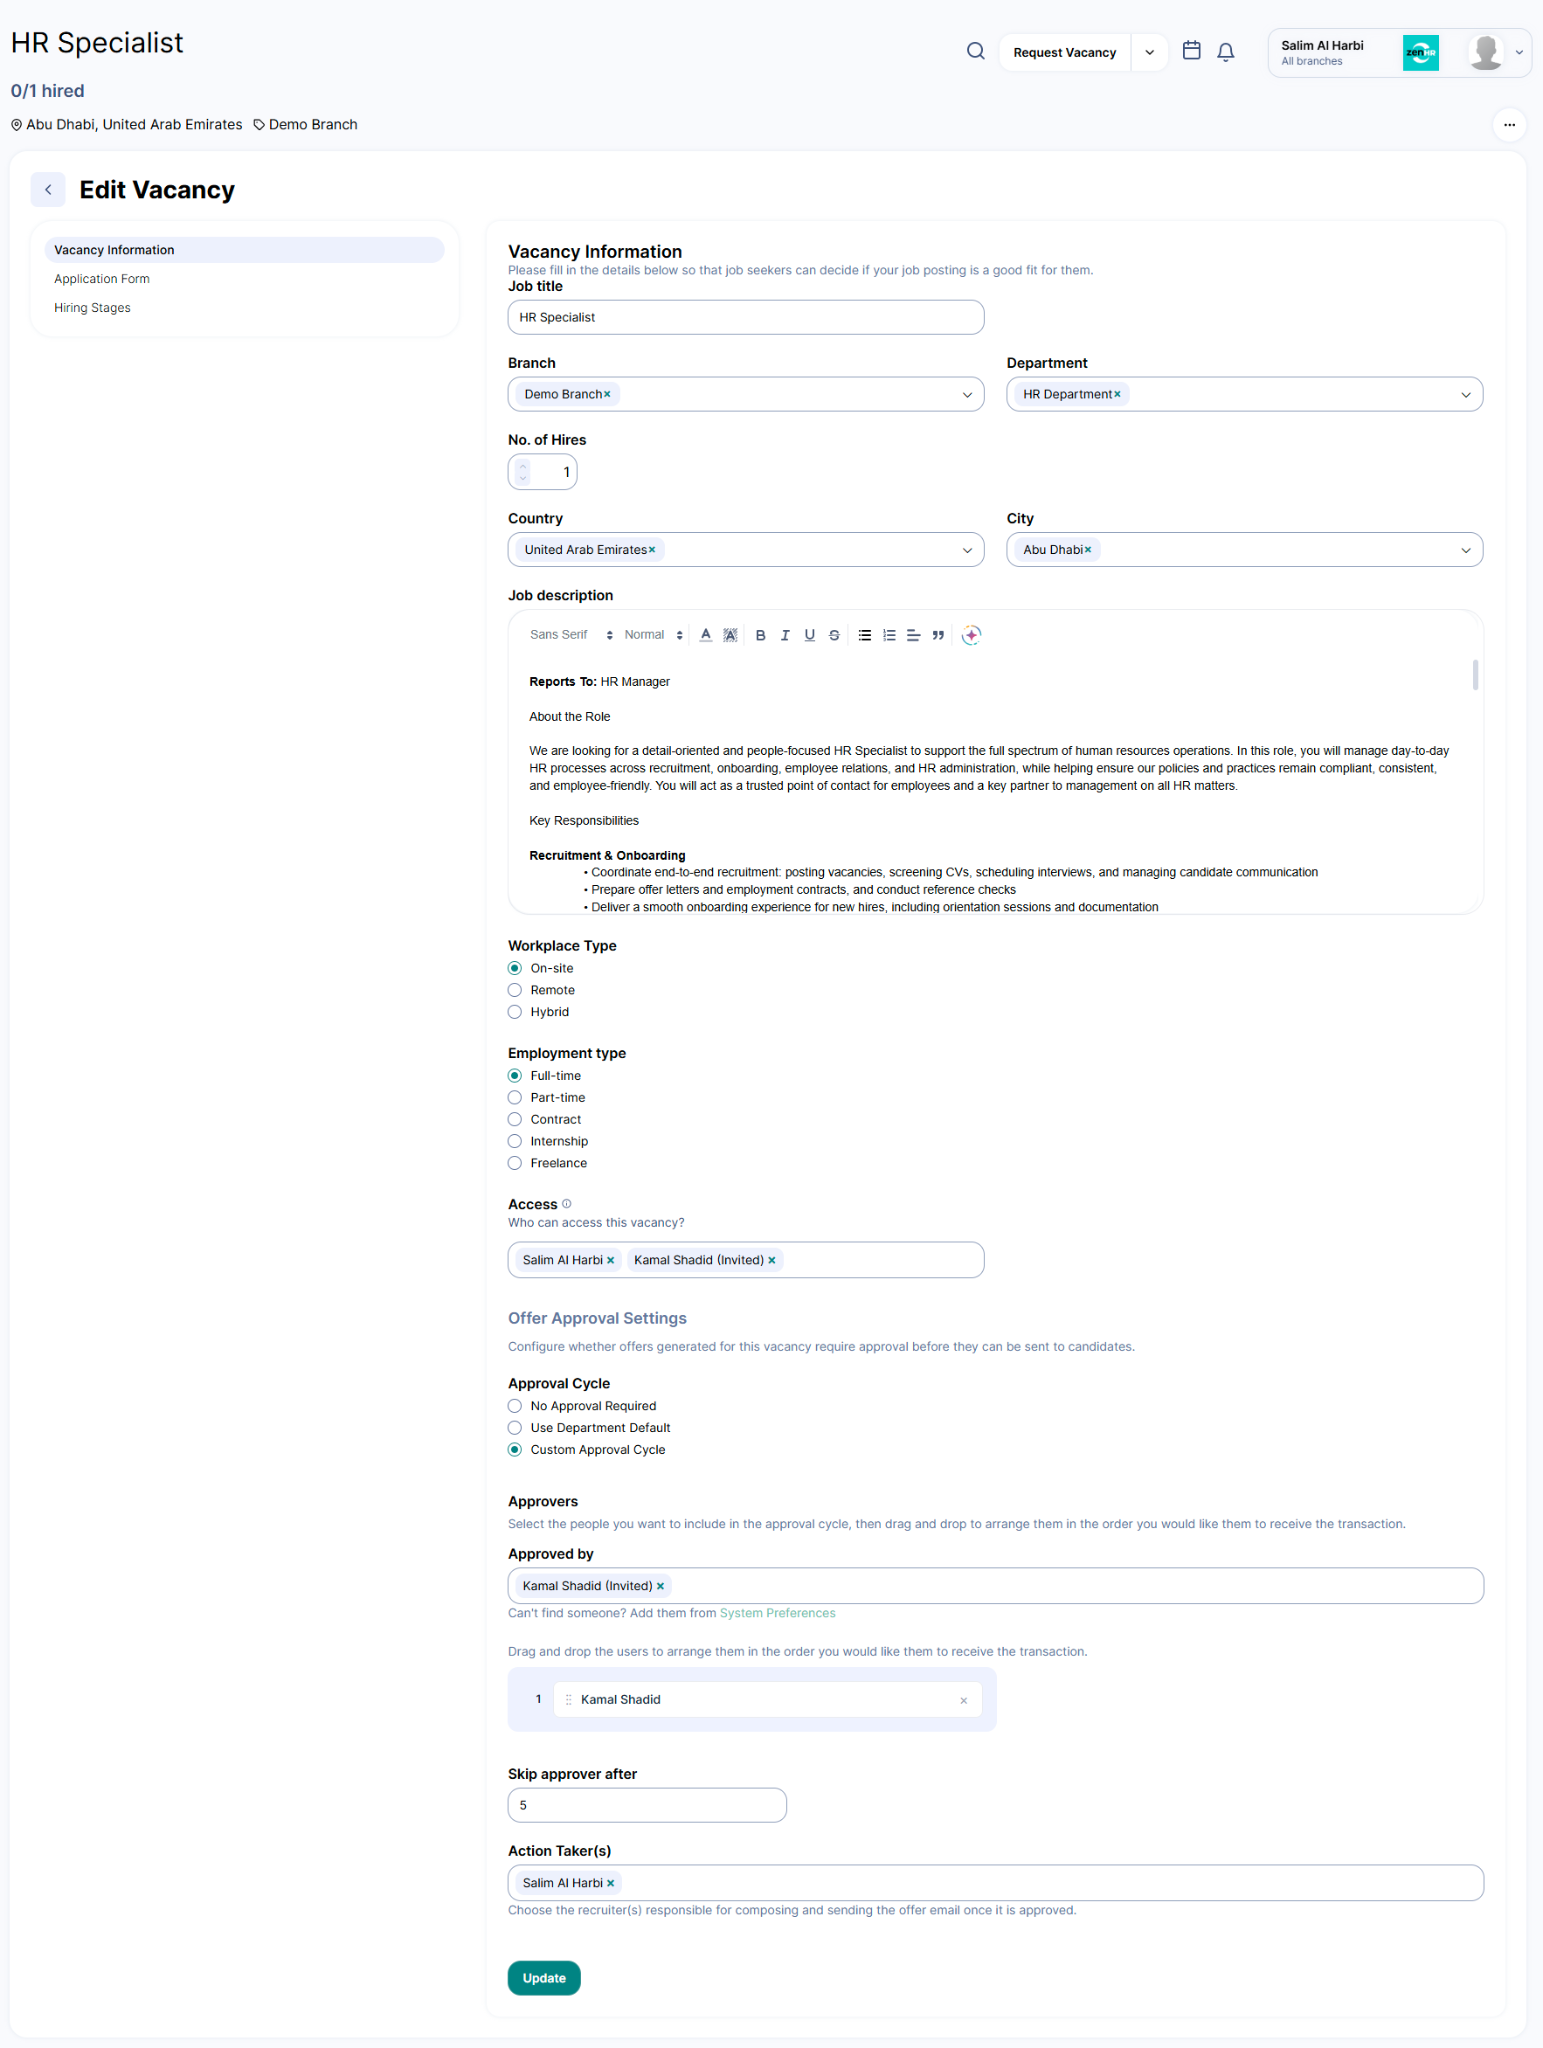
Go to Main Menu → Vacancies.
Open (or create) the vacancy, then enable/disable the approval cycle from the vacancy details form.
You can also change who the approvers and action takers are for that specific vacancy.
Step 3: Generate a Job Offer
This is the process a recruiter follows to send an offer for approval.
Go to Main Menu → Vacancies → Active.
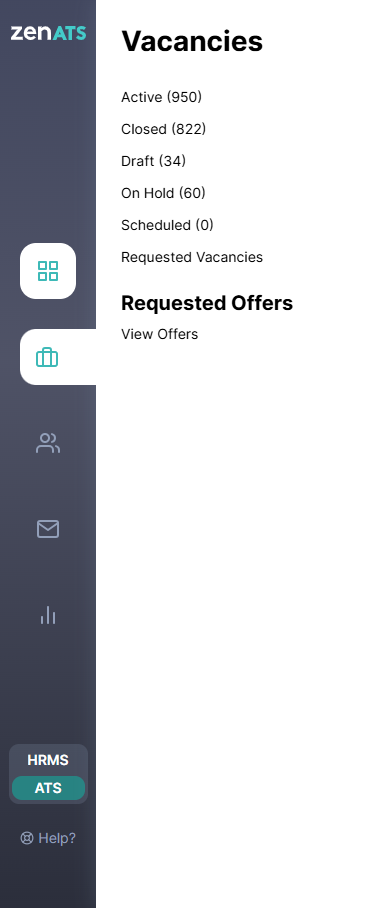
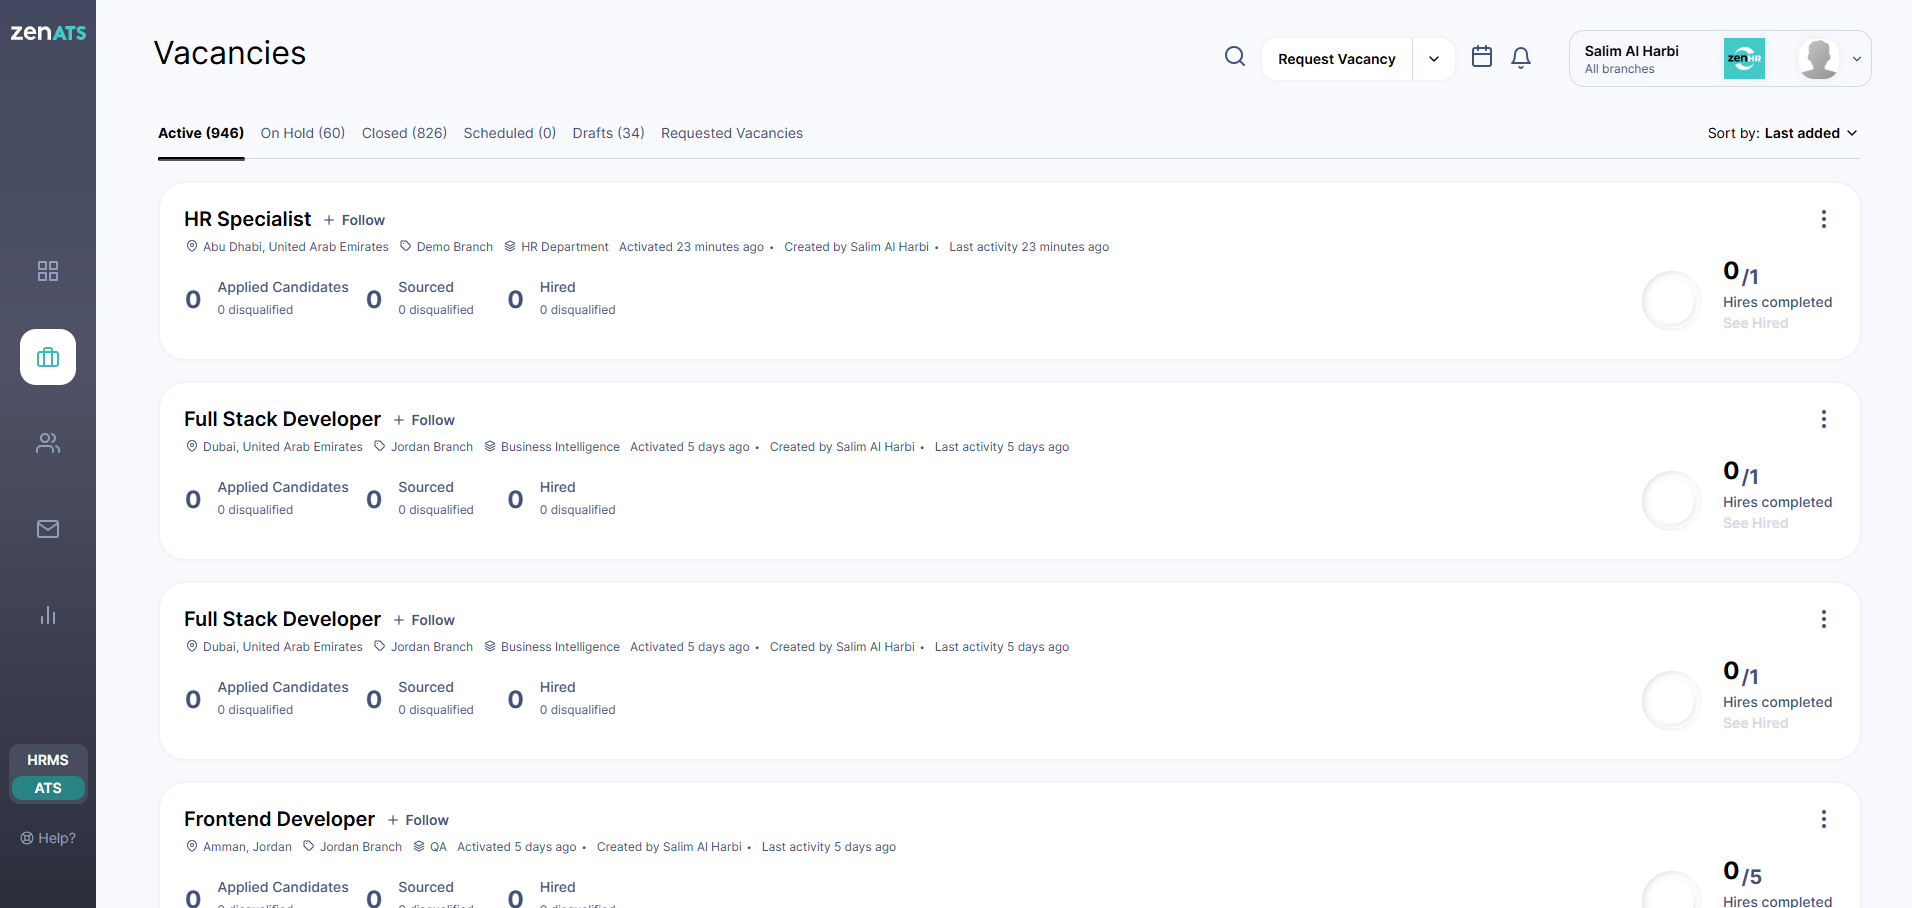
Select the vacancy you want to generate an offer for.
Find the candidate, then click the three dots (⋮) next to their name.
Select “Generate Offer” from the menu.
Choose the offer template you want to use.
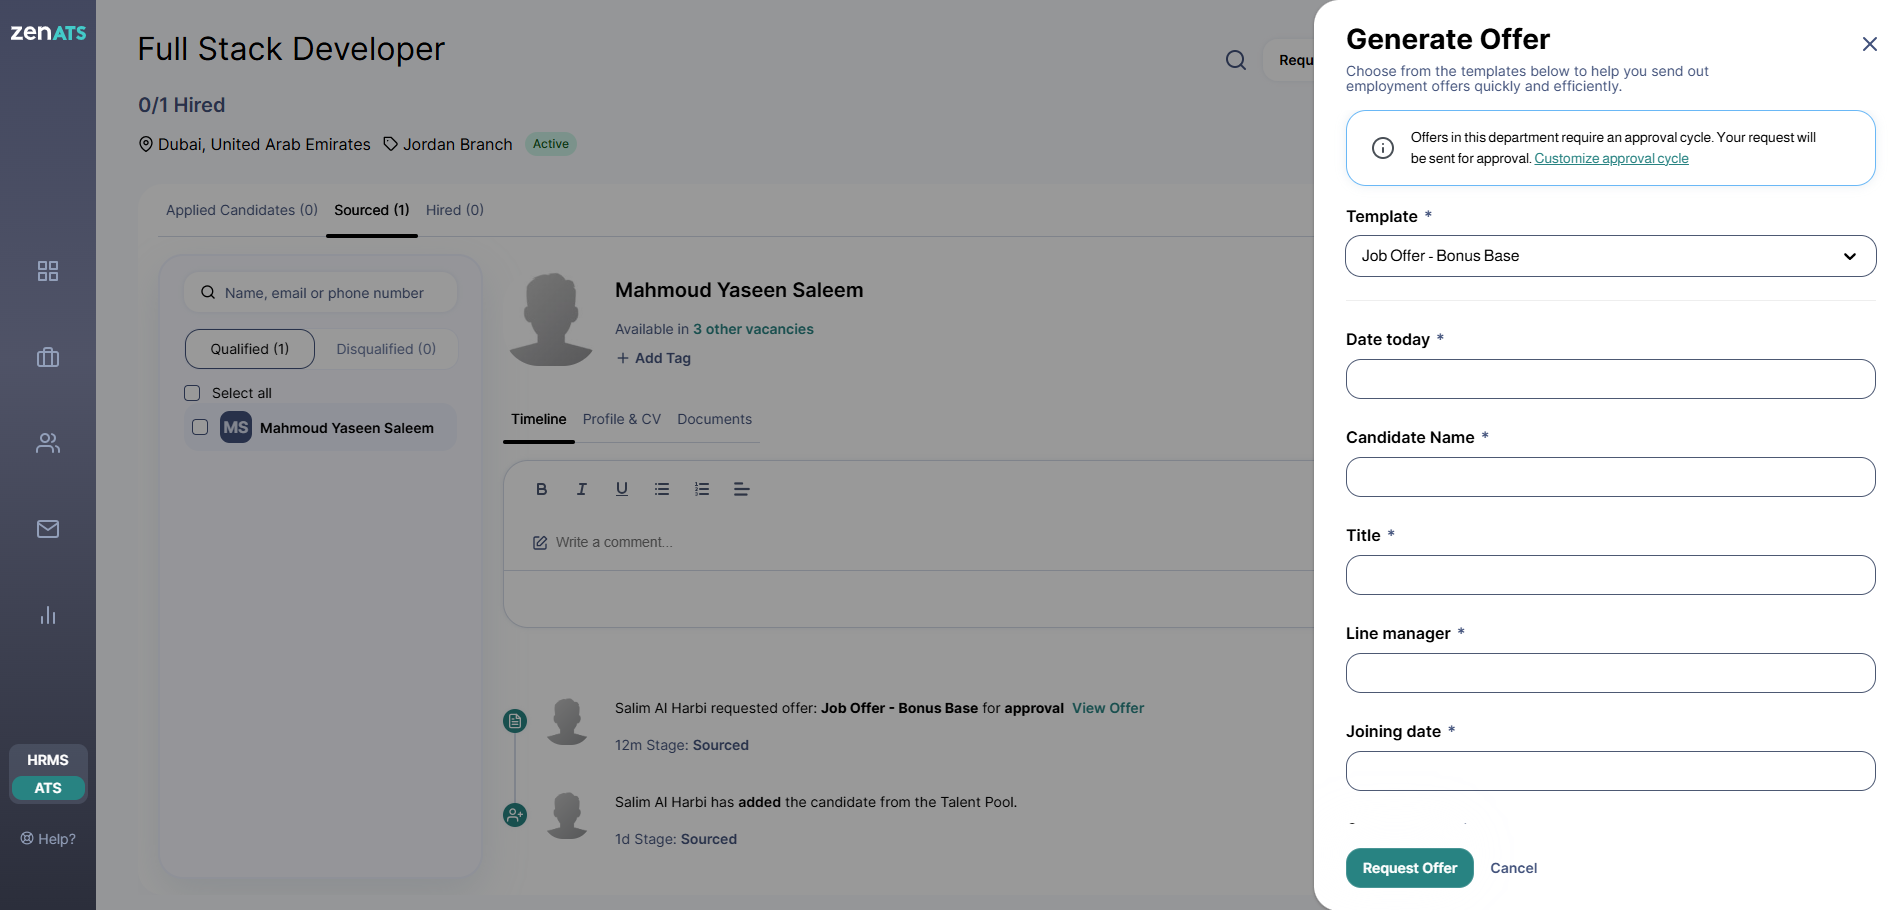
Fill in the required fields (job title, reports to, position, start date, expiry date, etc.). If this offer requires approval, a banner in the panel will let you know before you submit it.
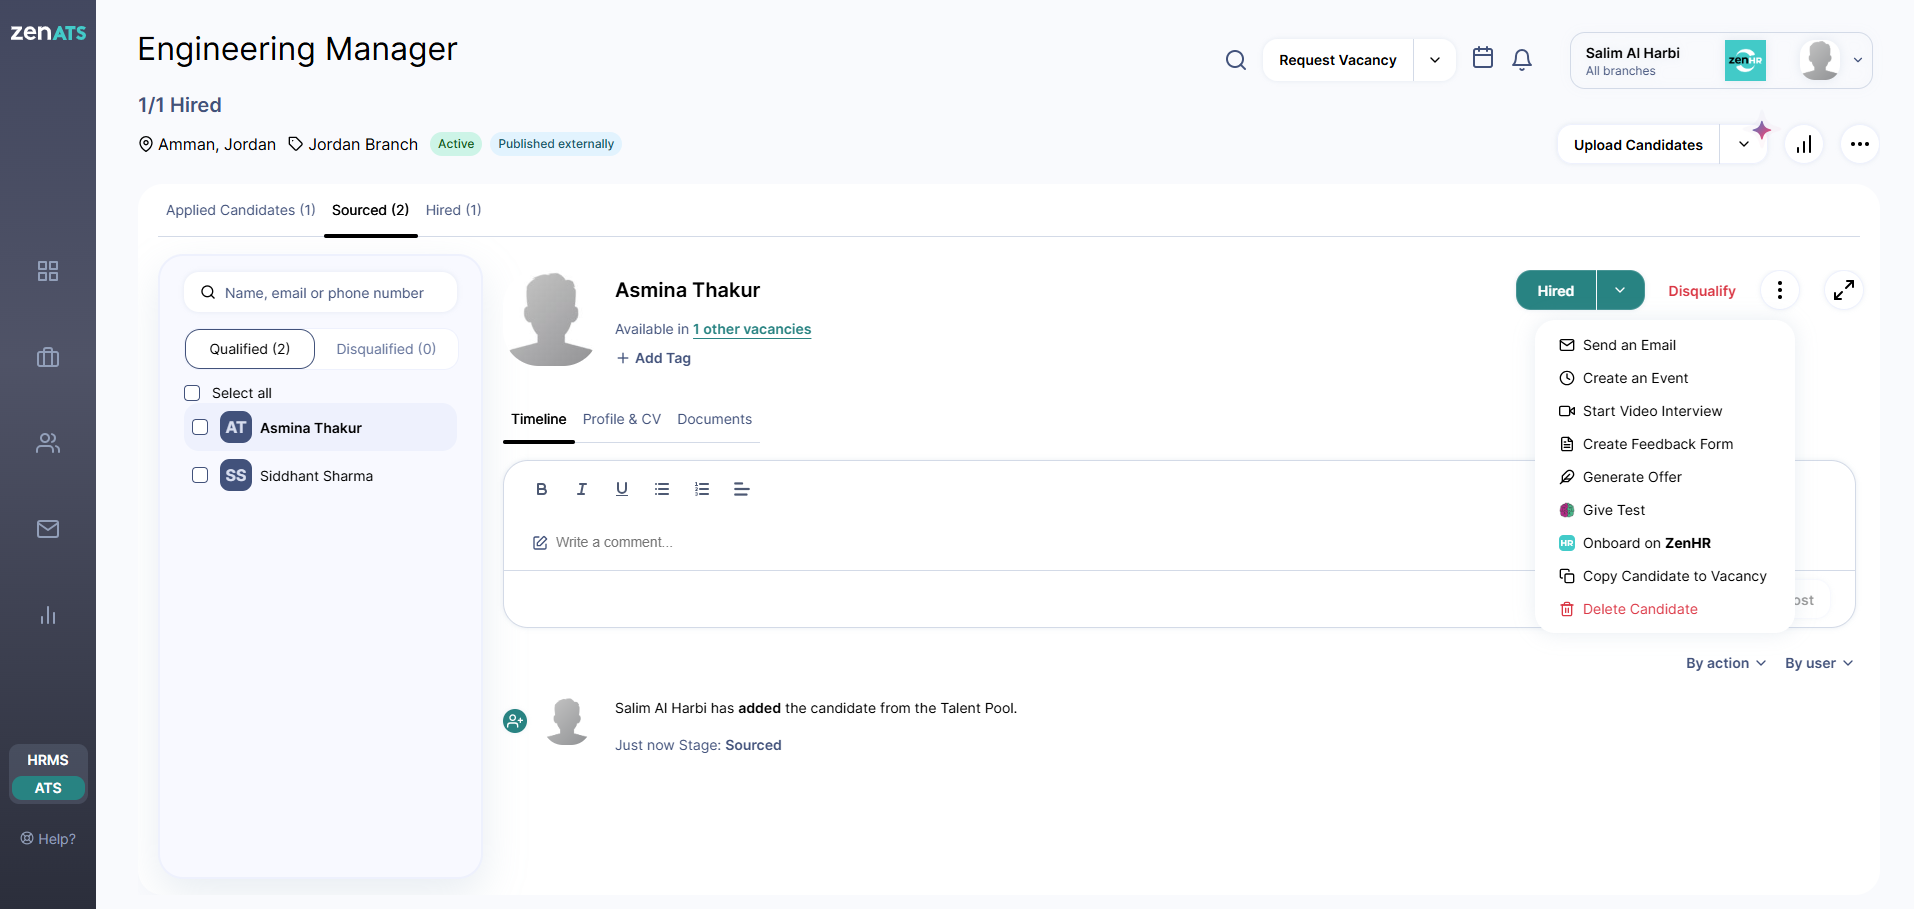
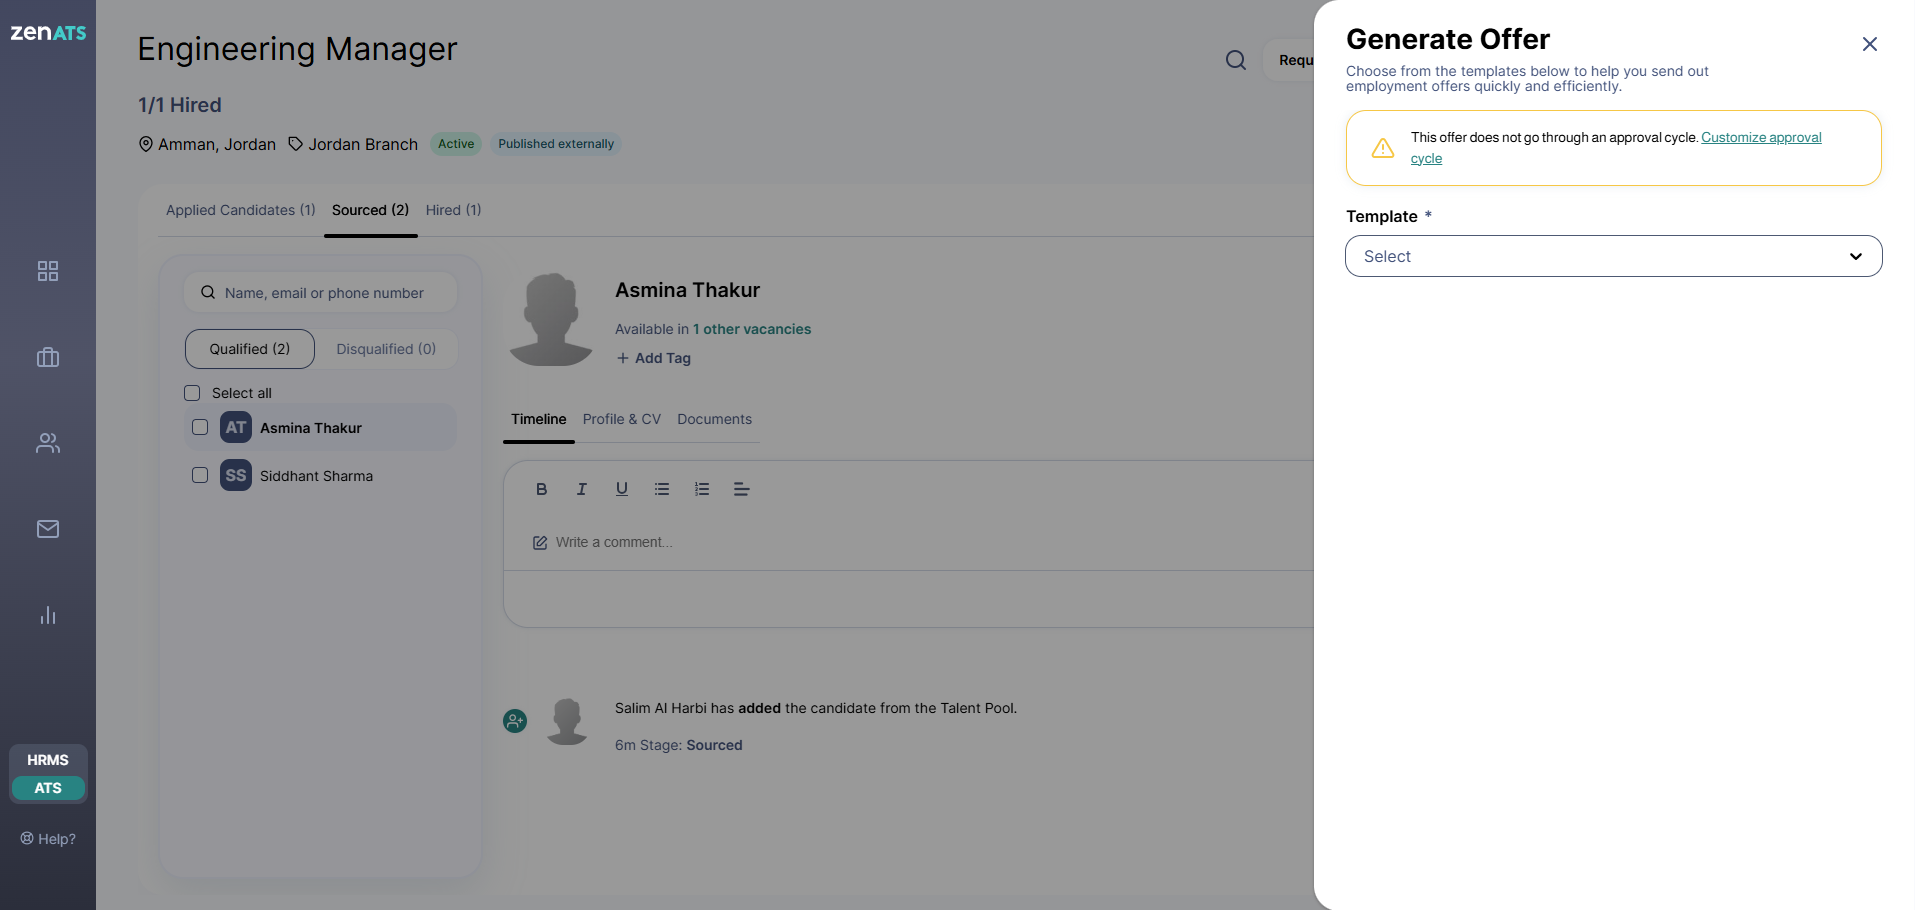
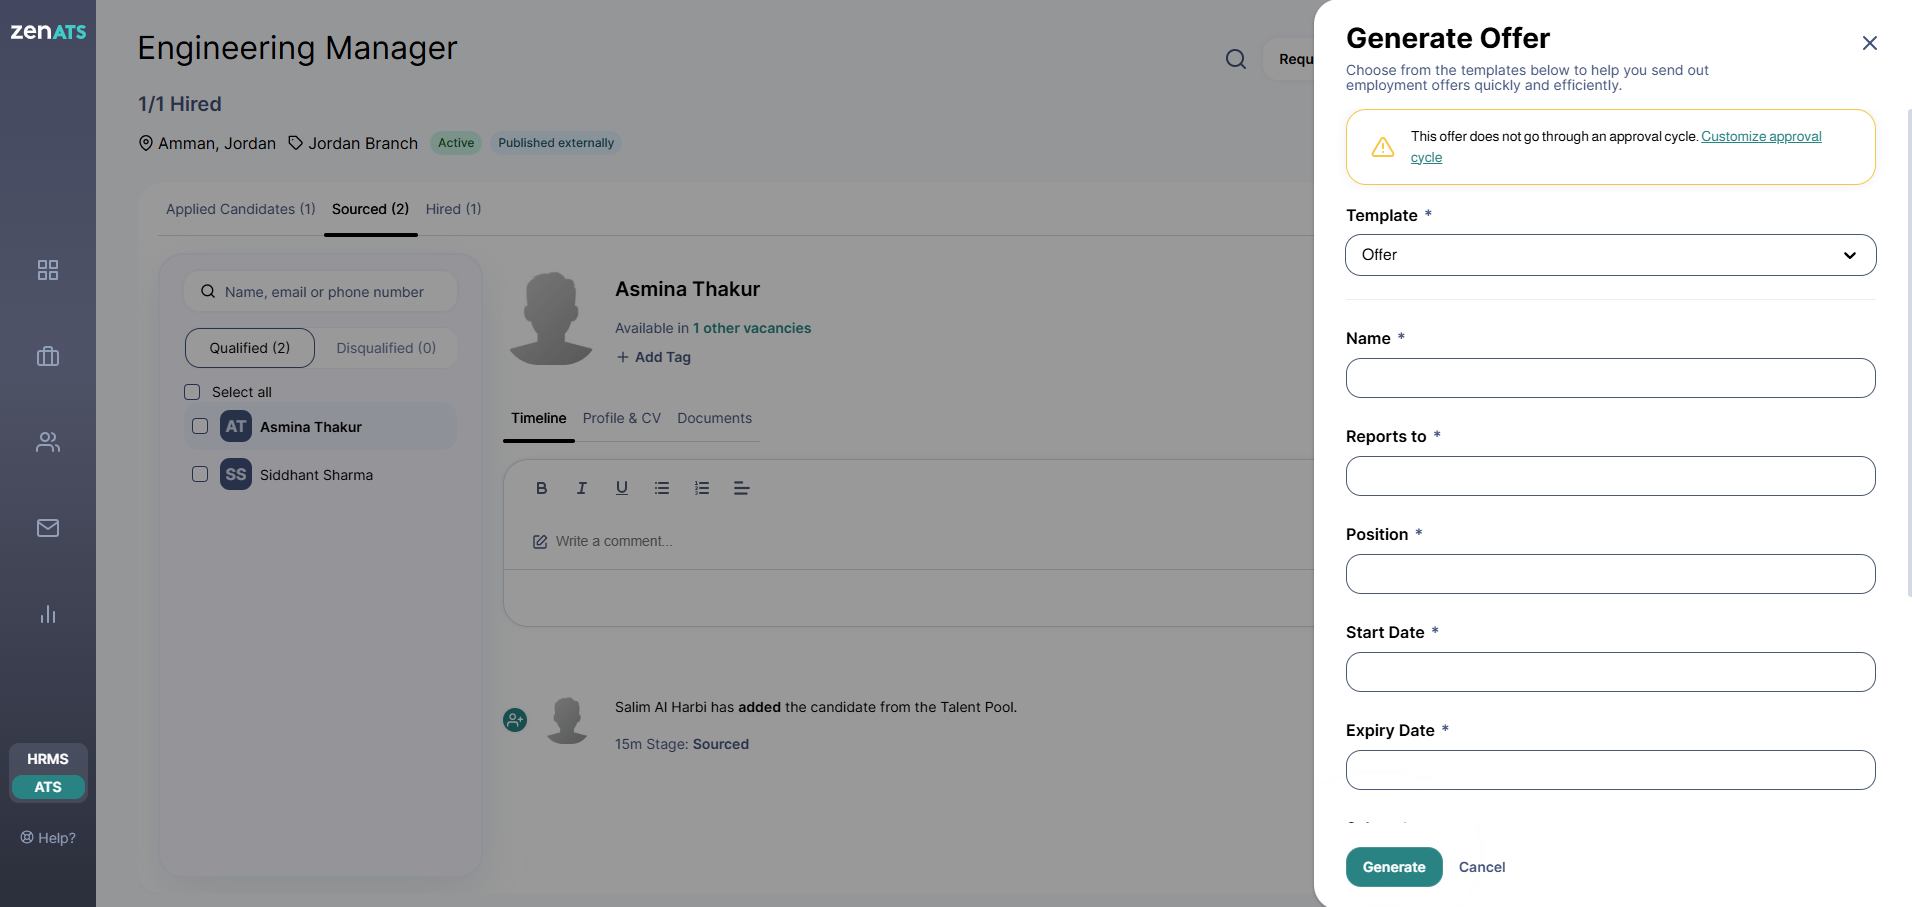
A message will be displayed in the slider to inform you whether the offer generation includes an approval cycle.
Click “Request Offer” to submit it for approval.
For Requesters: Tracking the Offers You've Sent
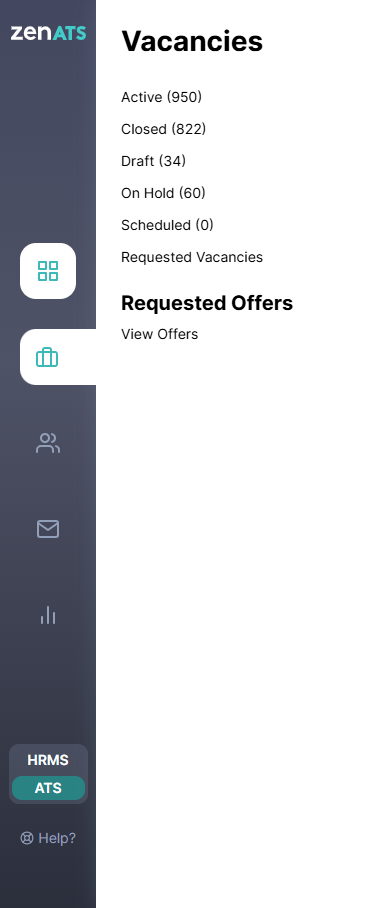
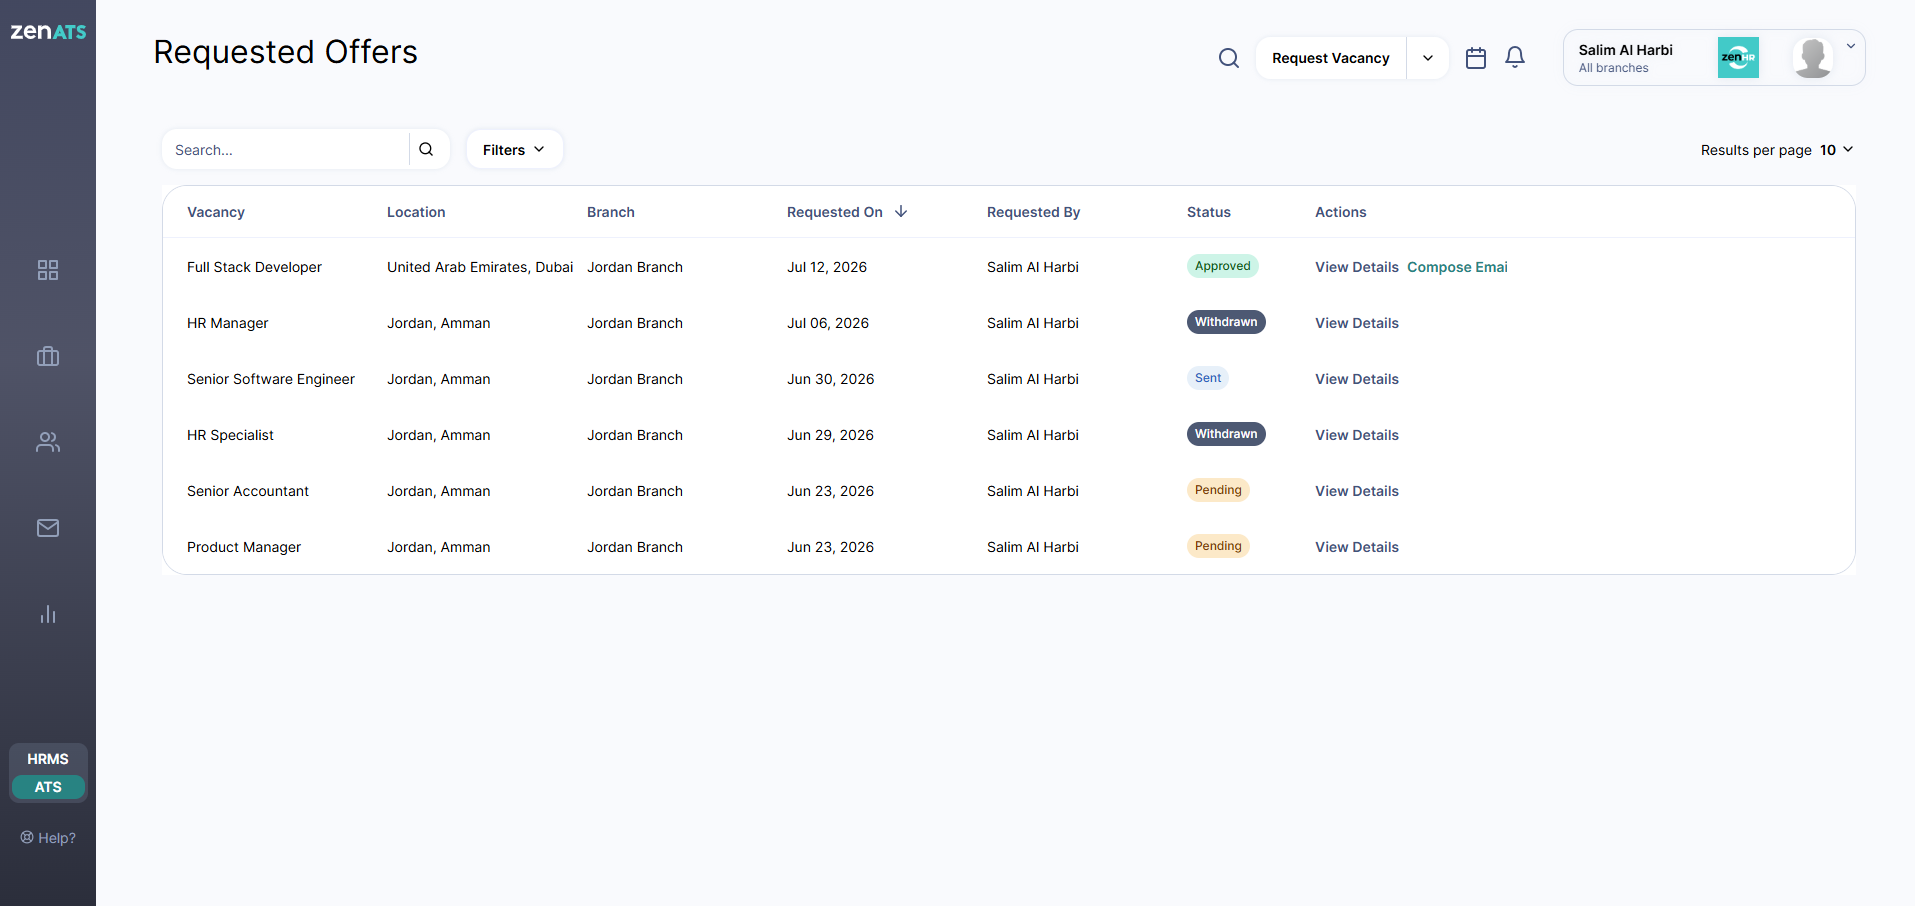
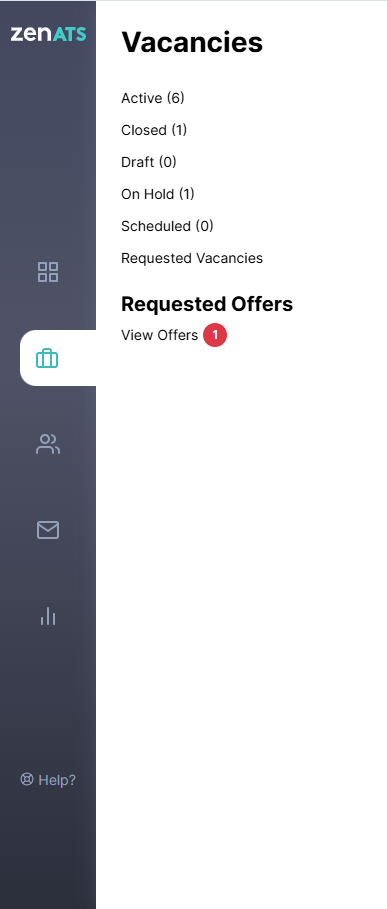
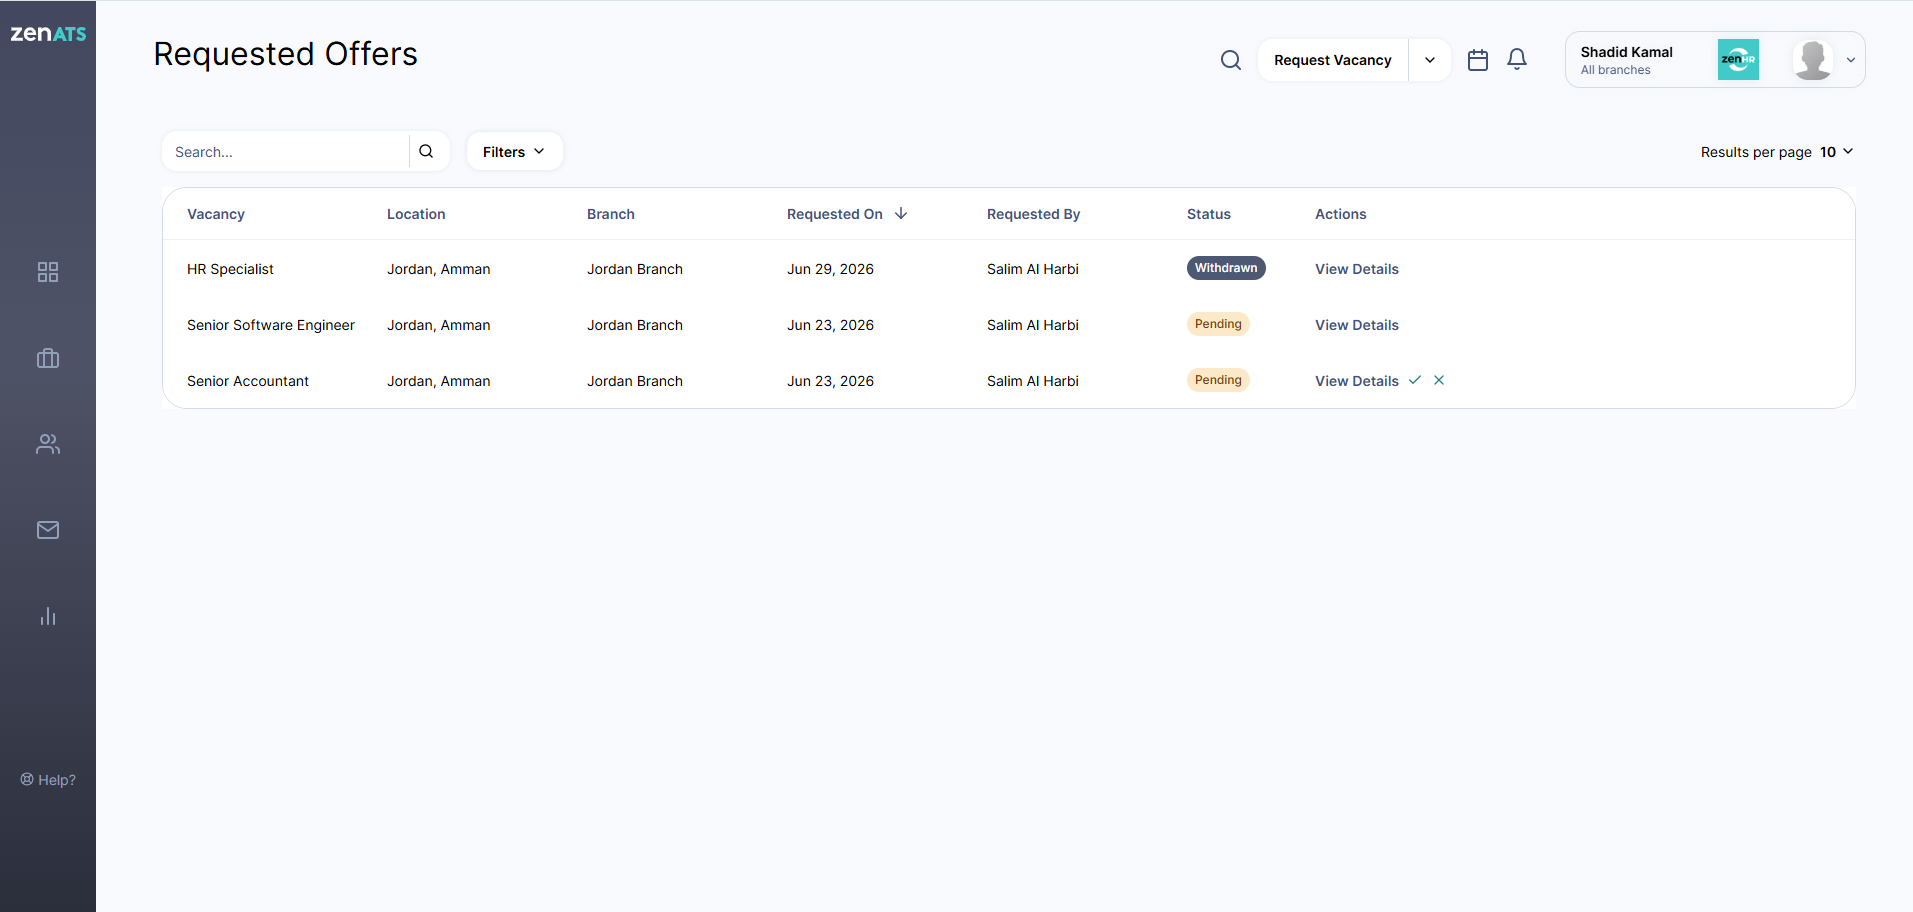
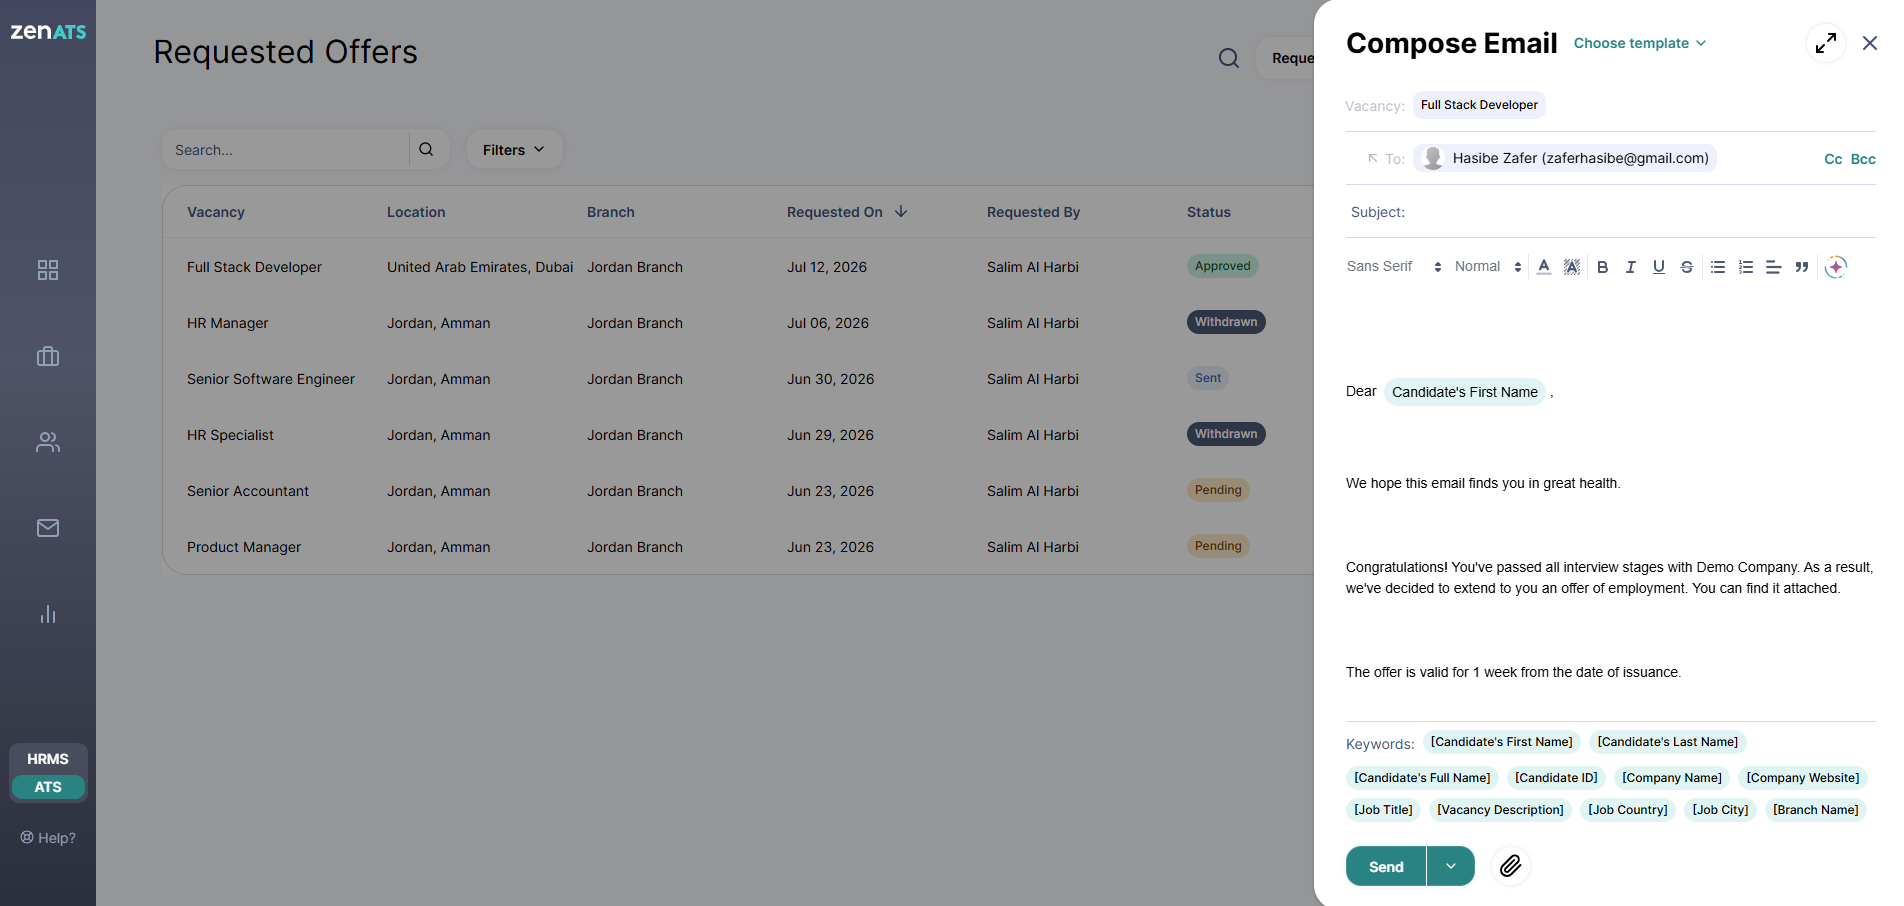
As a requester, go to Main Menu → Vacancies → Requested Offers to see every offer you've submitted.
Search and filter by candidate name, job title, template, department, or status.
Click a candidate's name to open their profile in a new tab.
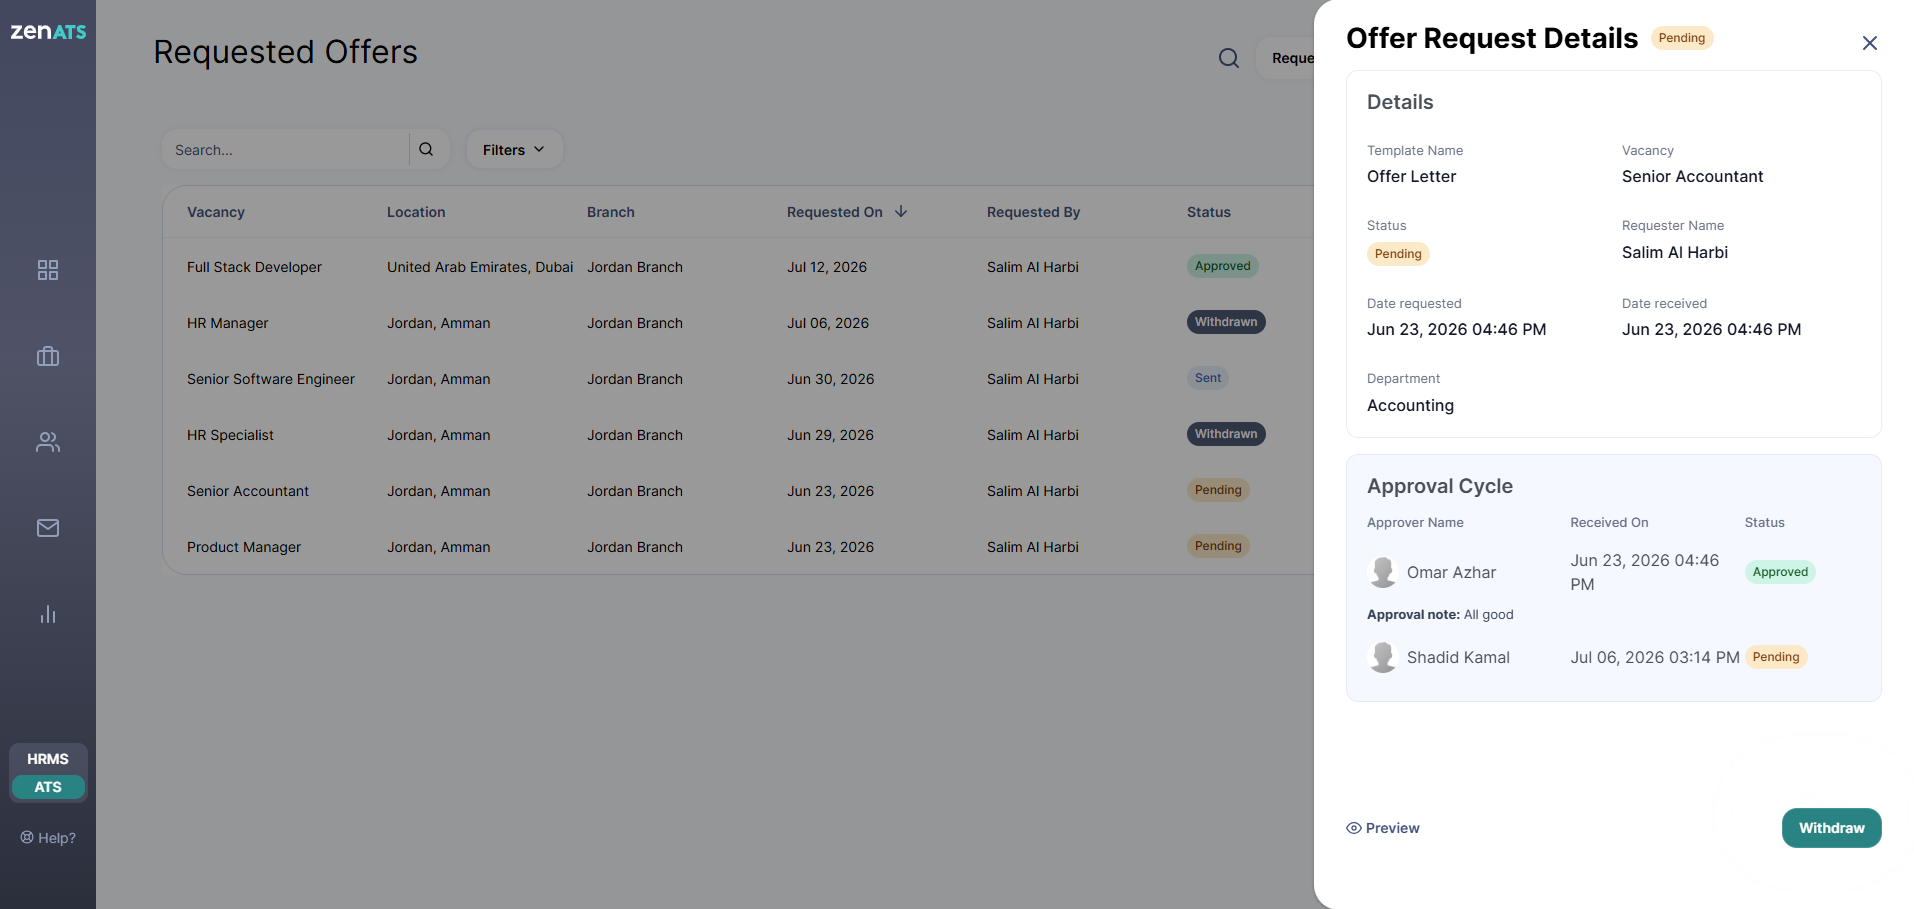
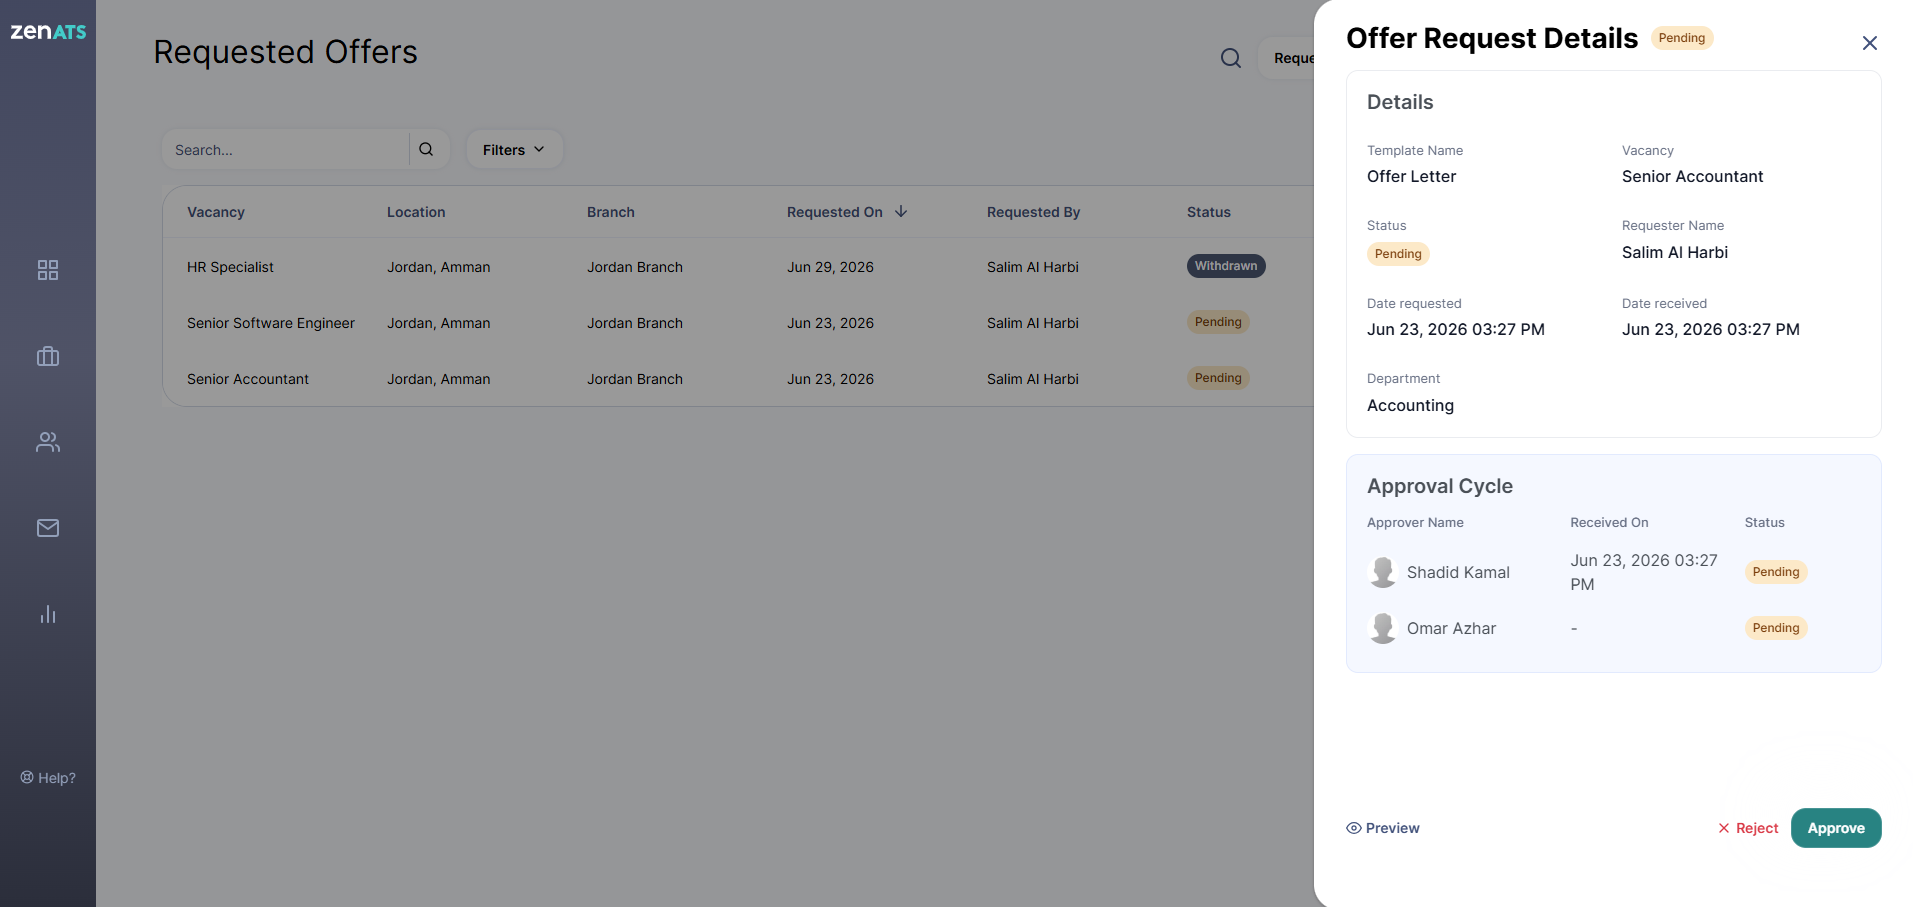
Click “View” in the Actions column to see full details, including the approval cycle and each approver's status.
Click “Withdraw” at any point before the offer is fully approved if you need to cancel the request.
Click “Preview” to see (and download) the offer letter.
You'll get a notification automatically as soon as the offer is approved or rejected.
Note: If you (the requester) are also one of the designated approvers, your approval is applied automatically; you won't need to approve your own request separately.
For Approvers: Reviewing Offers Awaiting Your Decision
As an approver, go to Main Menu → Vacancies → Requested Offers to see everything pending your review.
Search and filter the list the same way requesters can, by candidate, job title, template, department, or status.
Click “View” to open the full offer details and the approval cycle status.
Click “Preview” to review the offer letter itself before deciding.
Click Approve or Reject; you can add a note explaining your decision either way.
For Action Takers: Sending the Offer to the Candidate
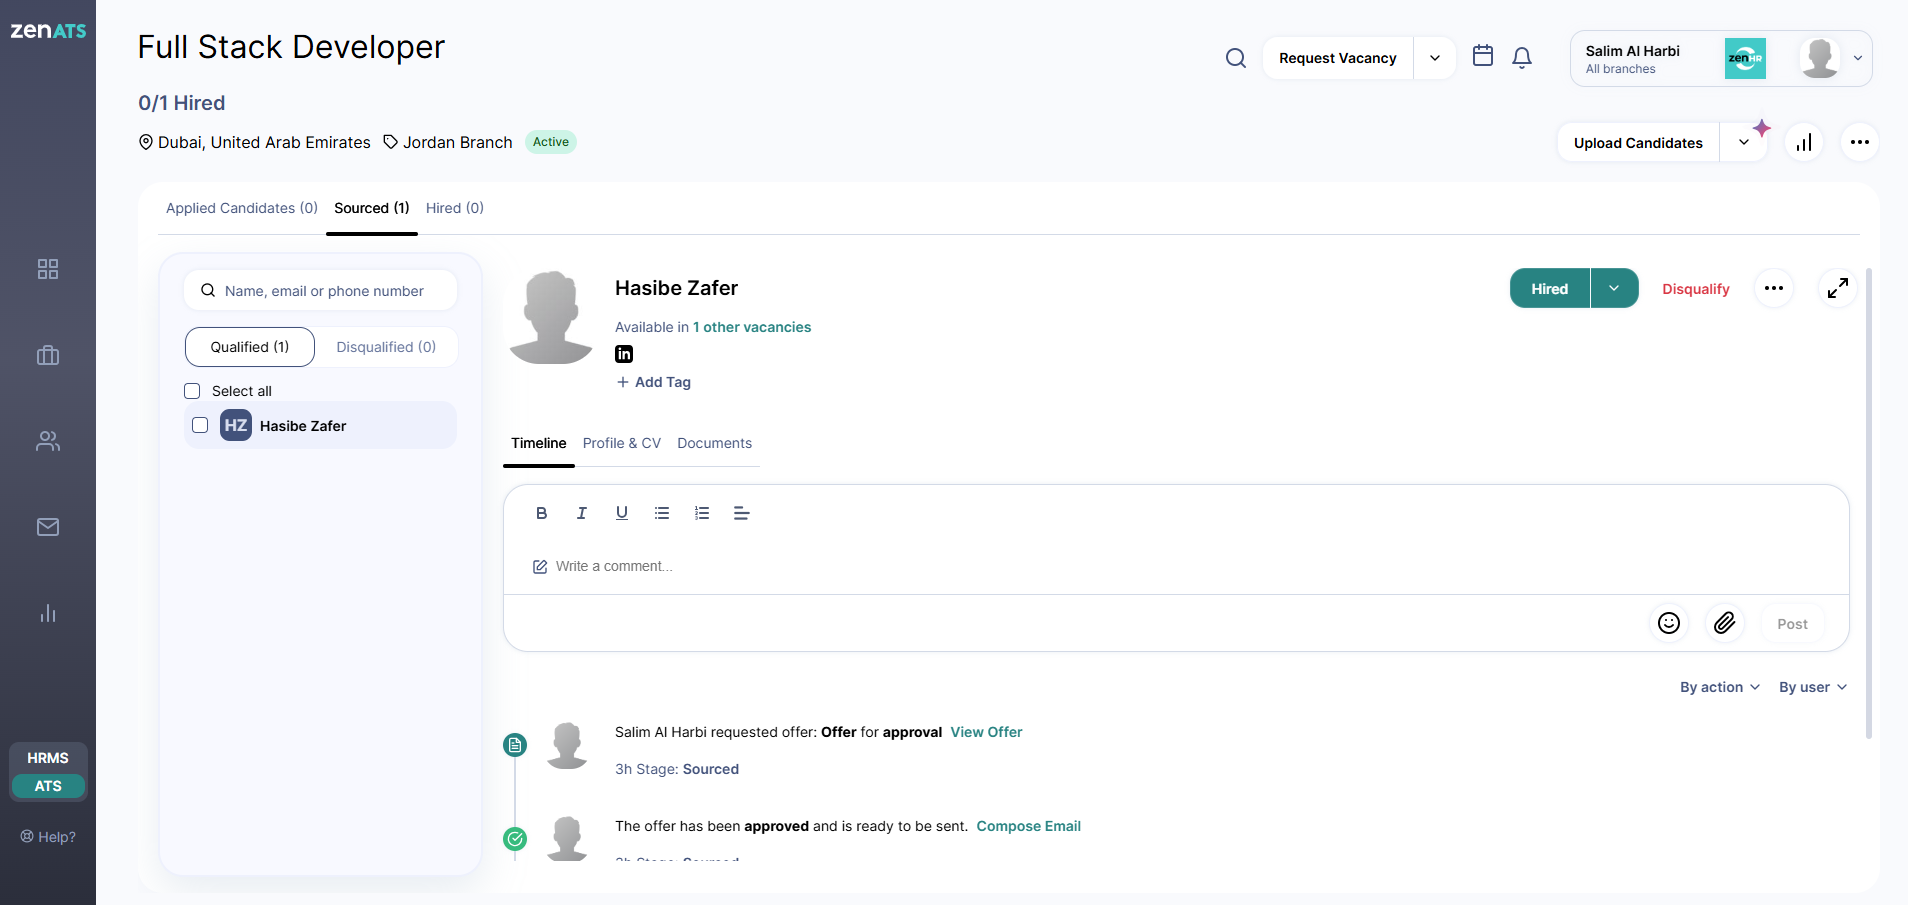
Once every approver has signed off, the designated action taker(s) get an in-app and email notification that the offer is ready to send.
Go to Main Menu → Vacancies → Requested Offers.
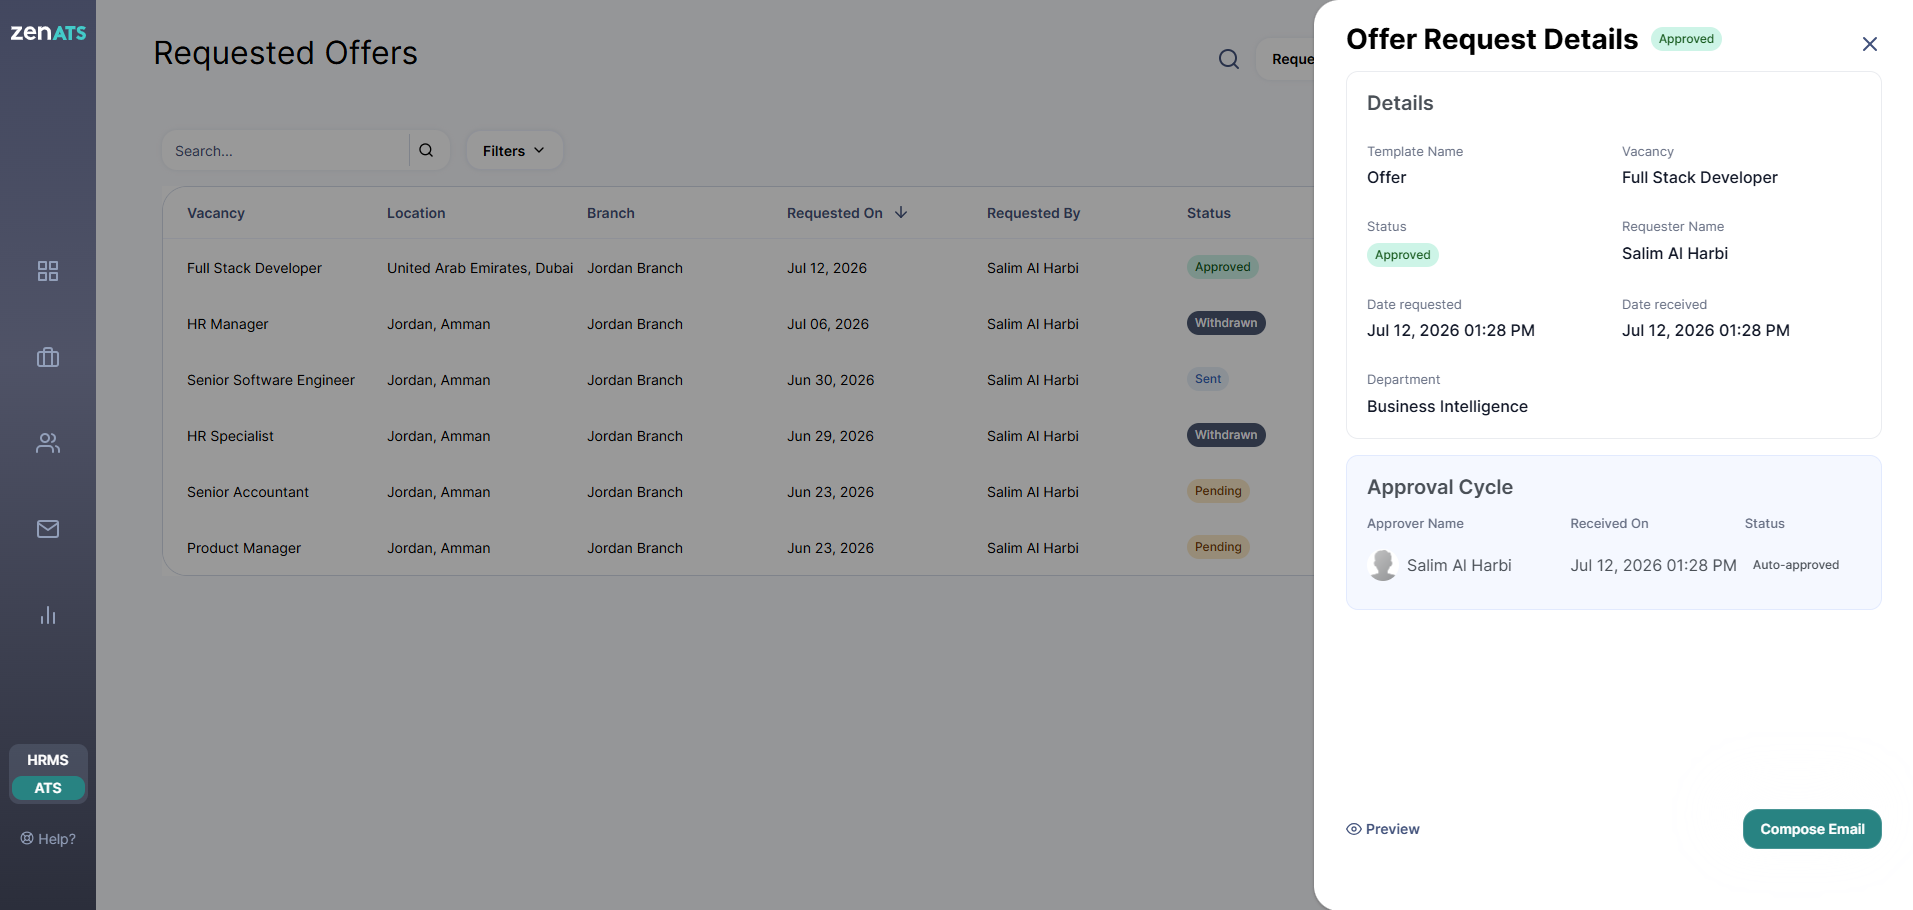
Click Compose Email in the Actions column (or open the offer details and take the action from there).
Click “Preview” first if you want to double-check the offer letter.
Click “Compose Email, " then edit the subject and body as needed; a default template is pre-filled for you.
Click “Send” to deliver the offer letter to the candidate.
All of these updates, requests, approvals, rejections, and sending also appear automatically on the candidate's timeline, so anyone reviewing their profile can see the full history.
Job Offer Status Reference
Every job offer request will show one of the following statuses:
Reporting
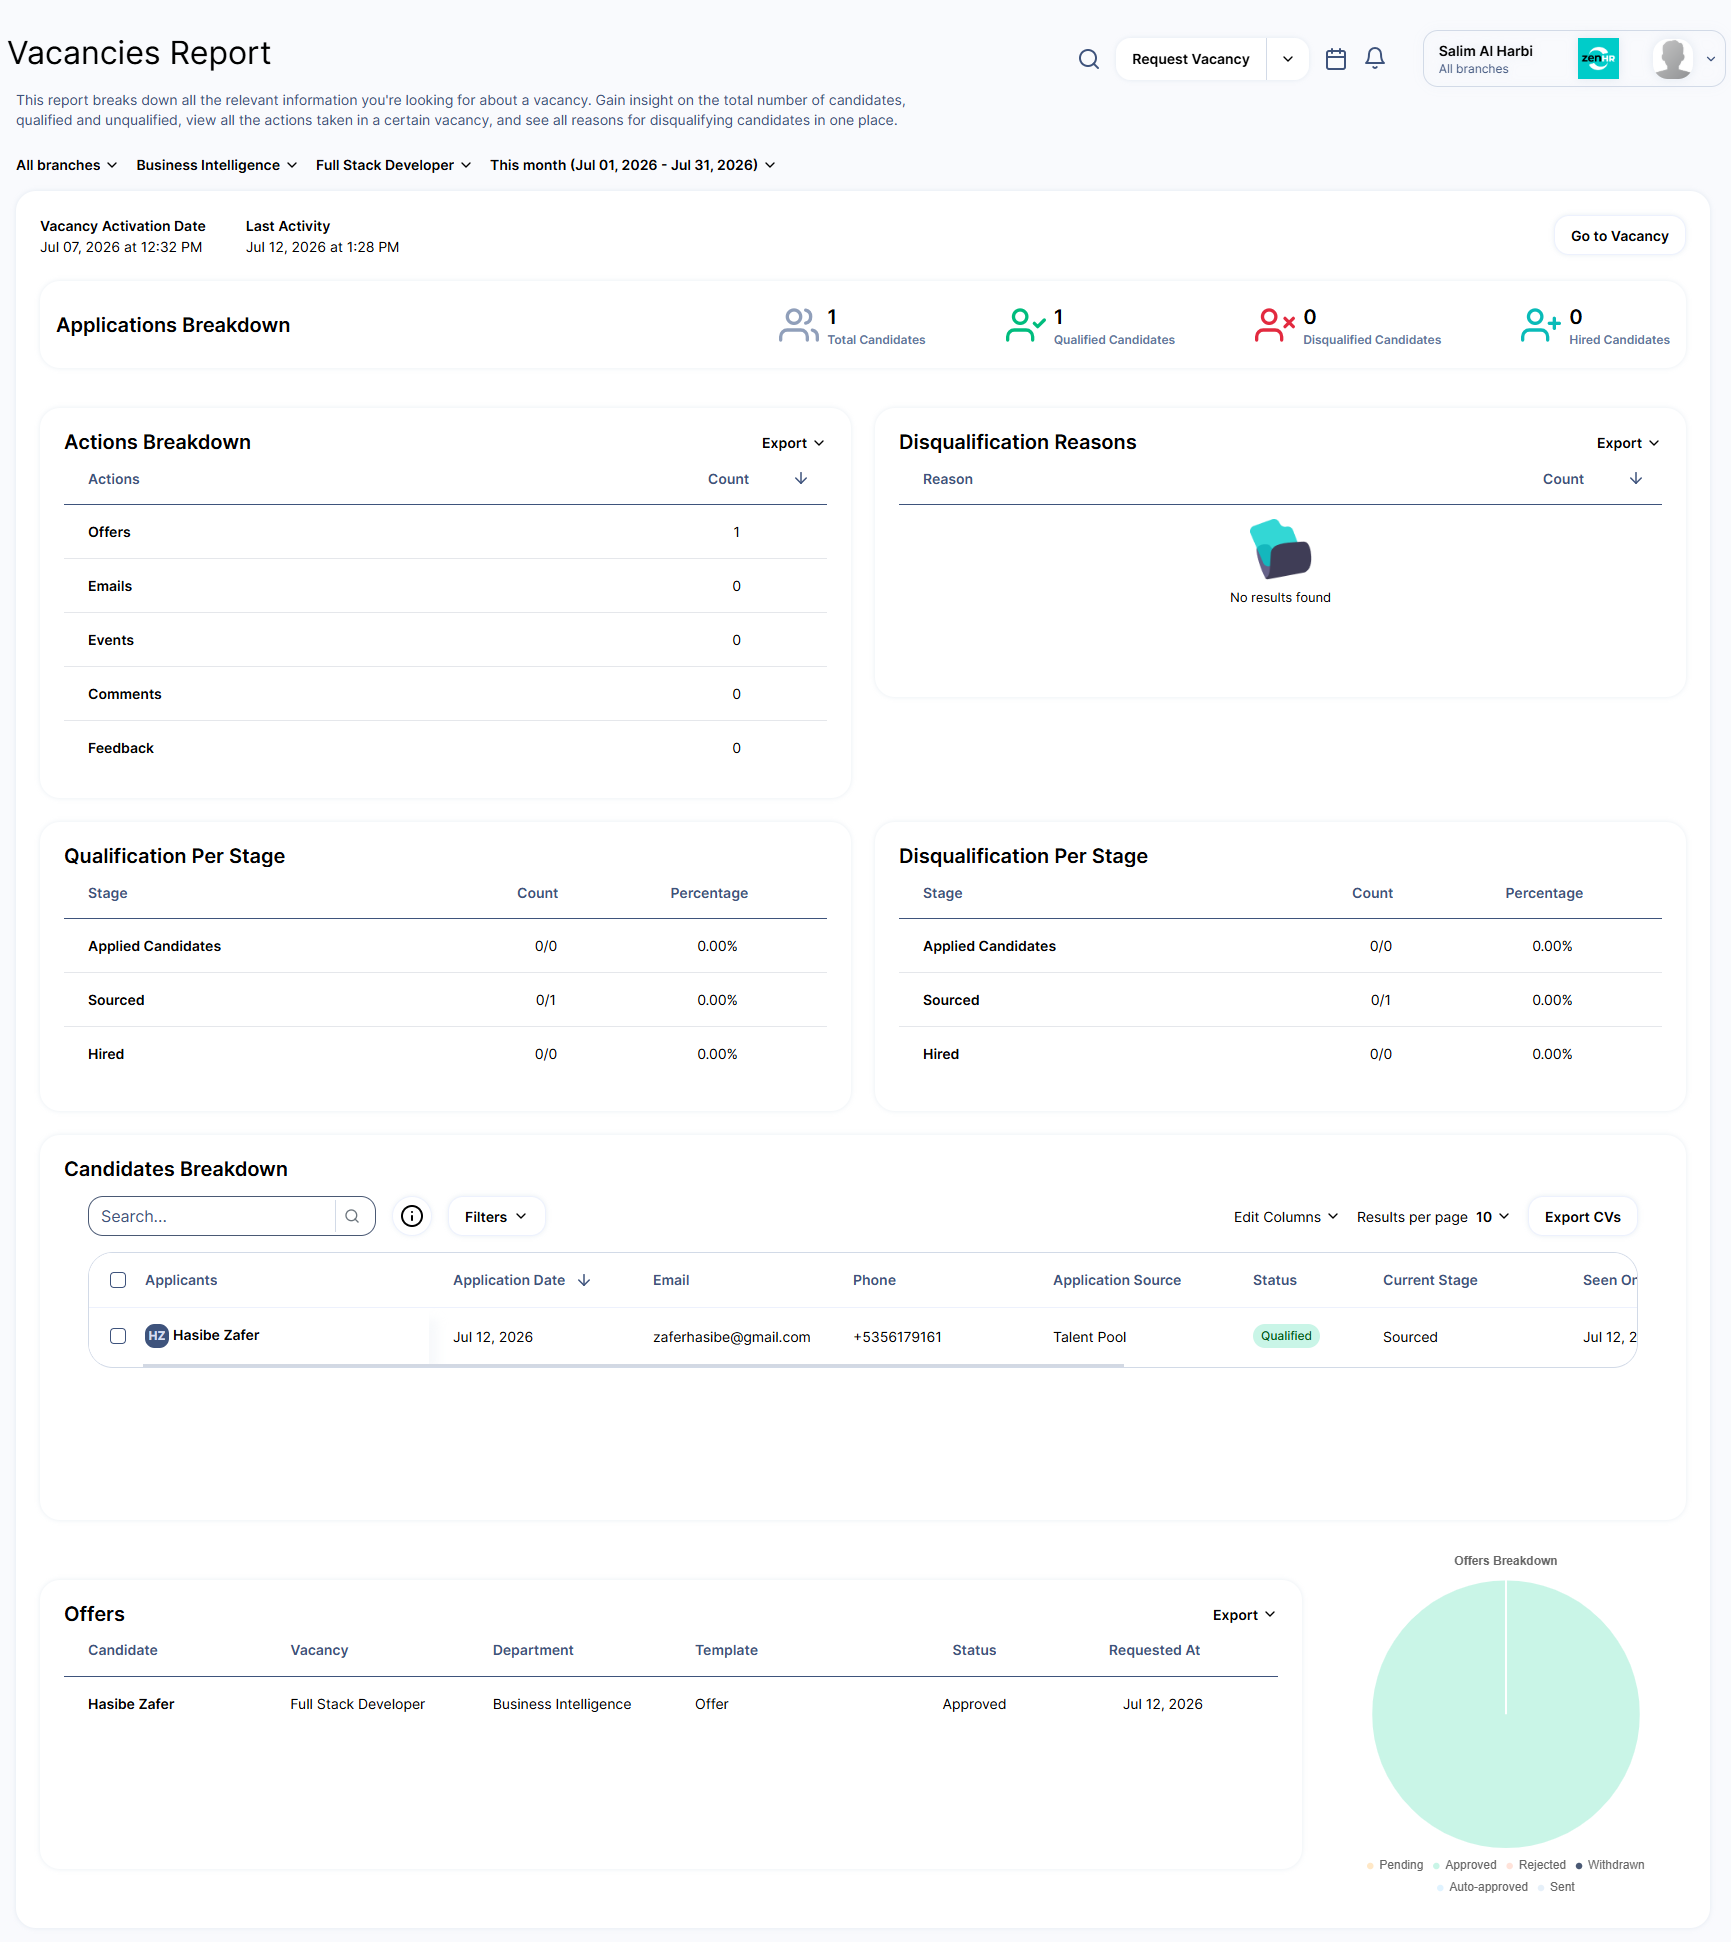
Offer data is included in the Vacancies report, which shows every offer and its approval request details (if any) along with a breakdown of statuses.
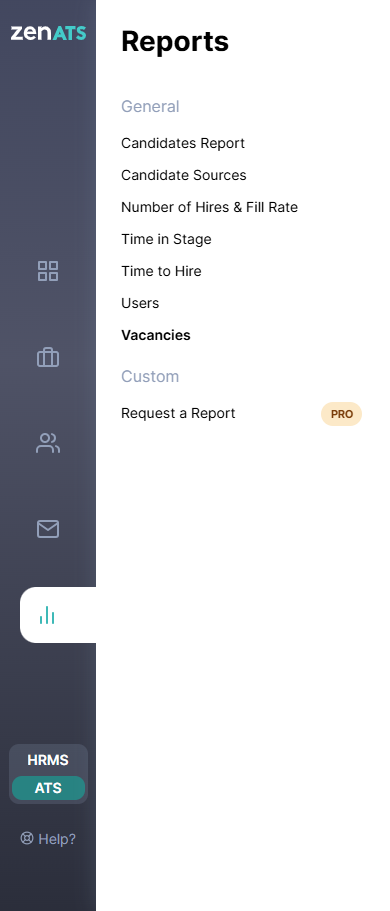
Go to Main Menu → Report → Vacancies to view it.
Was this article helpful?
That’s Great!
Thank you for your feedback
Sorry! We couldn't be helpful
Thank you for your feedback
Feedback sent
We appreciate your effort and will try to fix the article