What is ZenTV?
ZenTV is a digital signage management tool built into ZenHR. It allows HR, admin, and office teams to manage workplace screens directly from ZenHR without needing USB drives, manual screen updates, or IT support.
With ZenTV, you can display company content across office screens, including announcements, employee birthdays, work anniversaries, new joiner welcomes, company values, policies, attendance QR codes, and more.
Content can be created, managed, and pushed to screens instantly from the ZenHR dashboard using the same ZenHR login.
ZenTV Availability
ZenTV is available to all ZenHR customers on any tier.
Customers can use one screen free forever, with the option to purchase additional screen packages based on their company’s size and needs.
Supported TV Systems
ZenTV is available on Android TV / Google TV.
And will soon be available on Samsung TVs with Tizen OS
LG TVs with webOS.
All TVs are managed from one place inside ZenHR.
How to Set Up ZenTV
ZenTV is set up on a branch level. This means each branch can manage its own TVs, channels, and content.
To access ZenTV settings from ZenHR, go to:
User Menu → System Preferences → TV Management
From this page, you can manage:
Content Items
Breaking News
TV Devices
Channel Setup
Channel Layouts
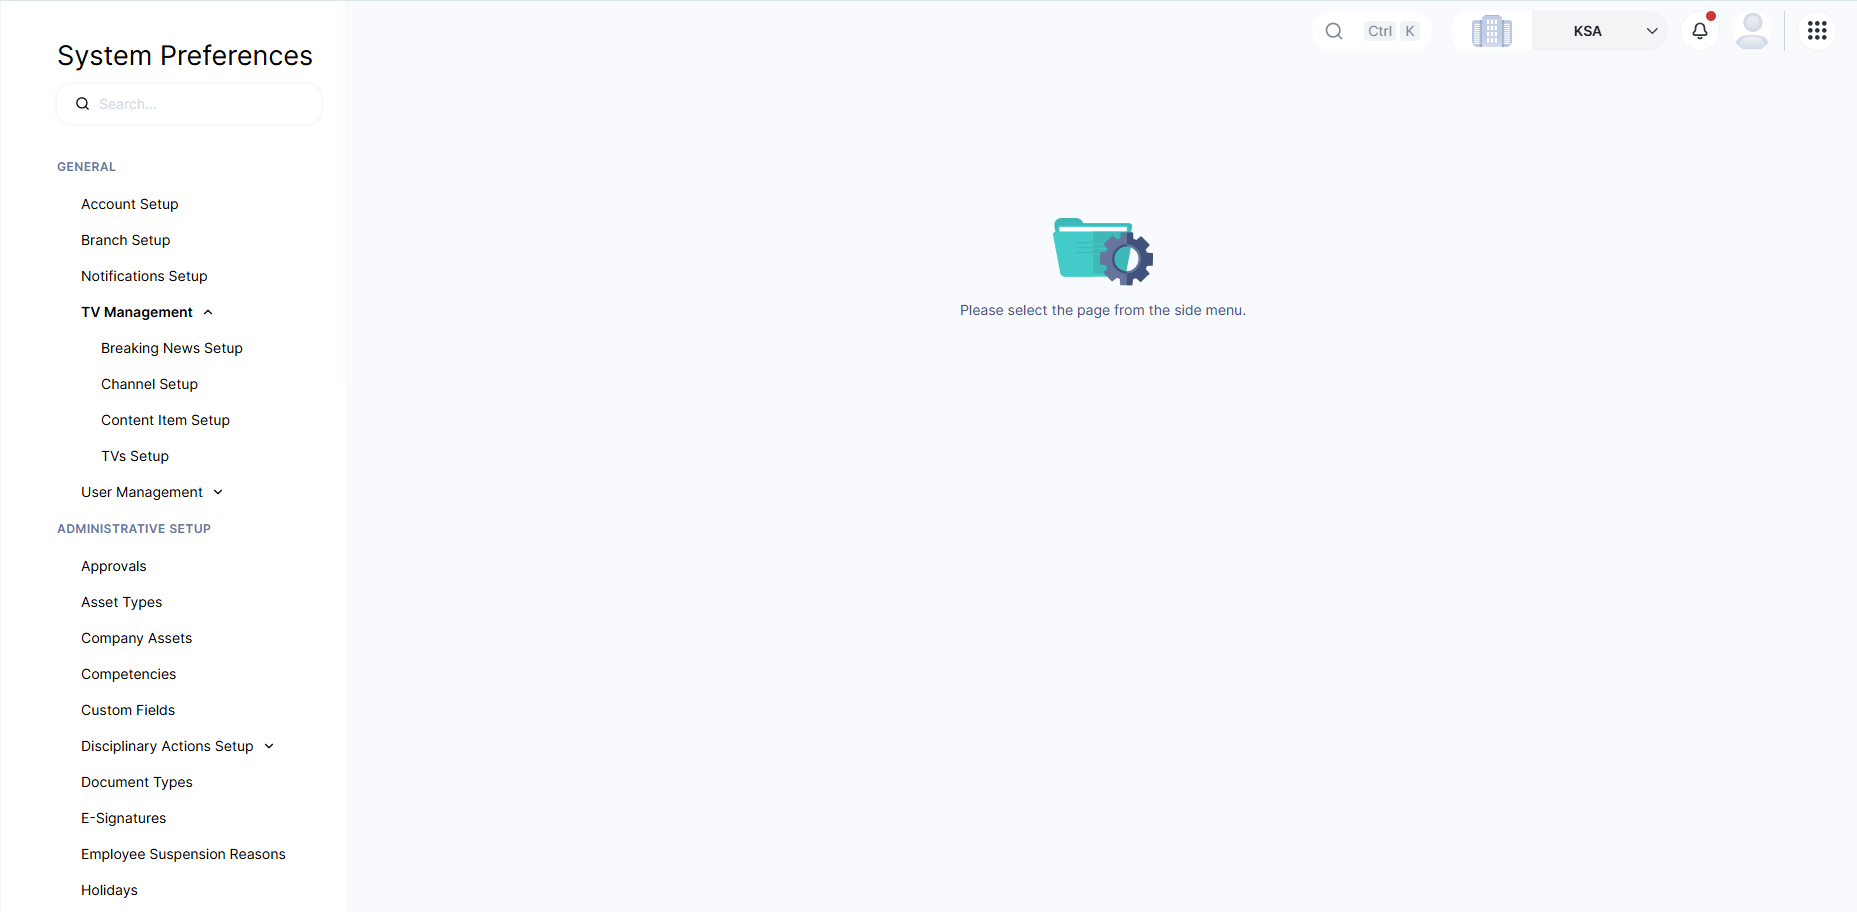
Step 1: Add Content Items
Content items are the pieces of content you want to display on your TVs. These items can later be added to channel layouts.
To add a new content item:
Go to User Menu → System Preferences → TV Management.
Open the Content Items page.
Click “Add Content Item”.
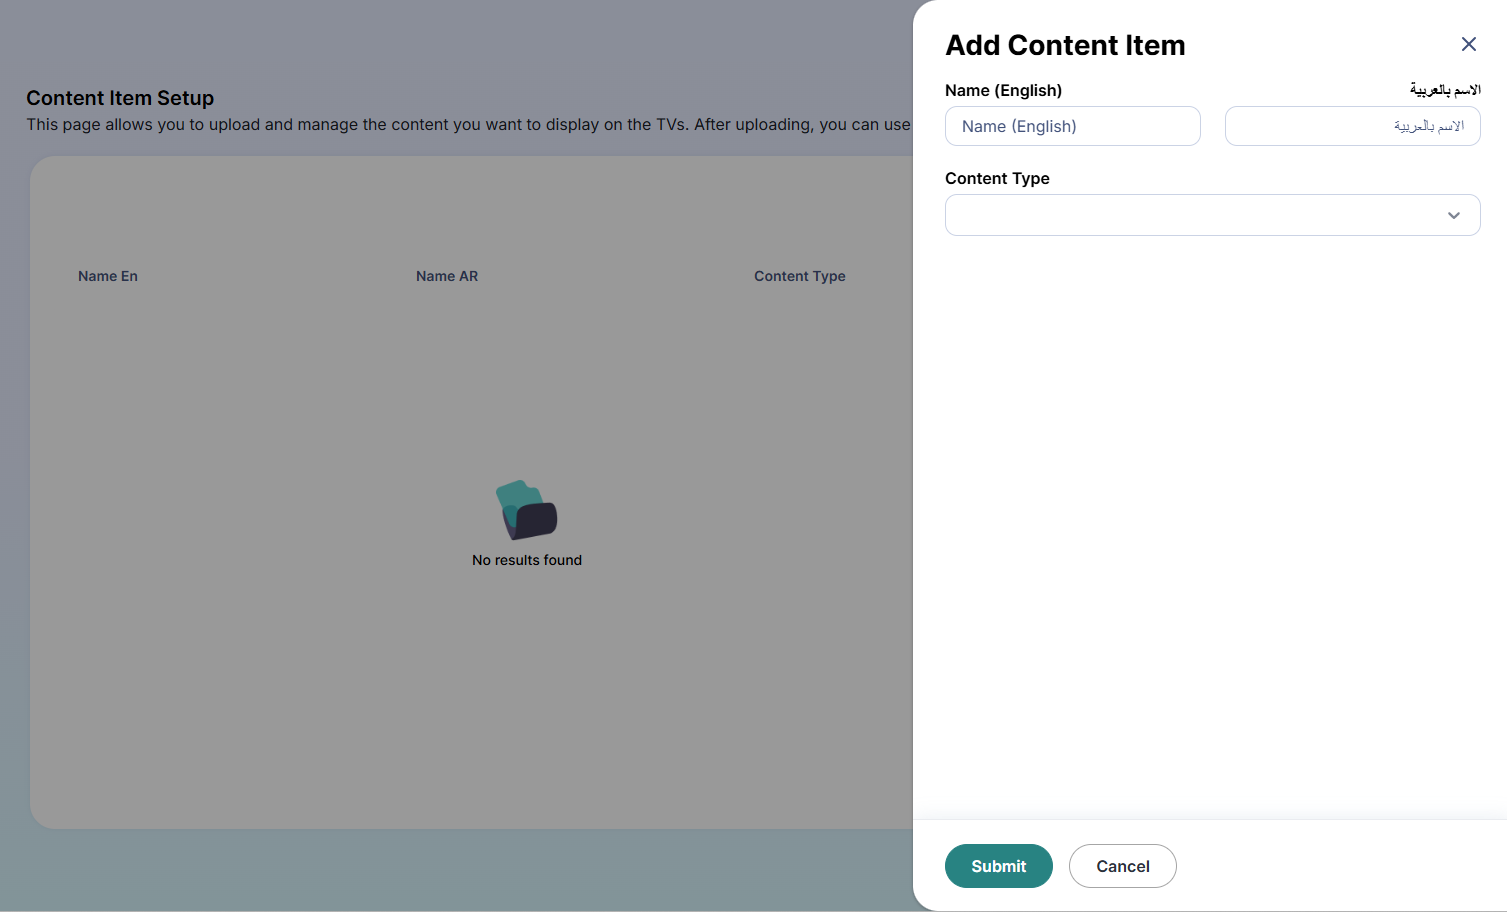
Enter the content item name.
Choose the content type.
Complete the required fields based on the selected content type.
Then, to add the content item, click “Submit”.
Available Content Types
You can choose from the following content types:
Announcement: Use this to display company announcements, reminders, or internal updates.
Attendance QR Code: Use this to display a QR code that employees can scan to clock in or clock out using ZenHR Attendance.
Birthday: Use this to display employee birthdays from ZenHR.
Photo: Use this to upload and display images, posters, designs, or internal communication visuals.
Video: Use this to upload and display video content on your office screens.
Who’s Off: Use this to display employees who are currently off, based on ZenHR leave data.
You can also edit or delete existing content items from the same page.
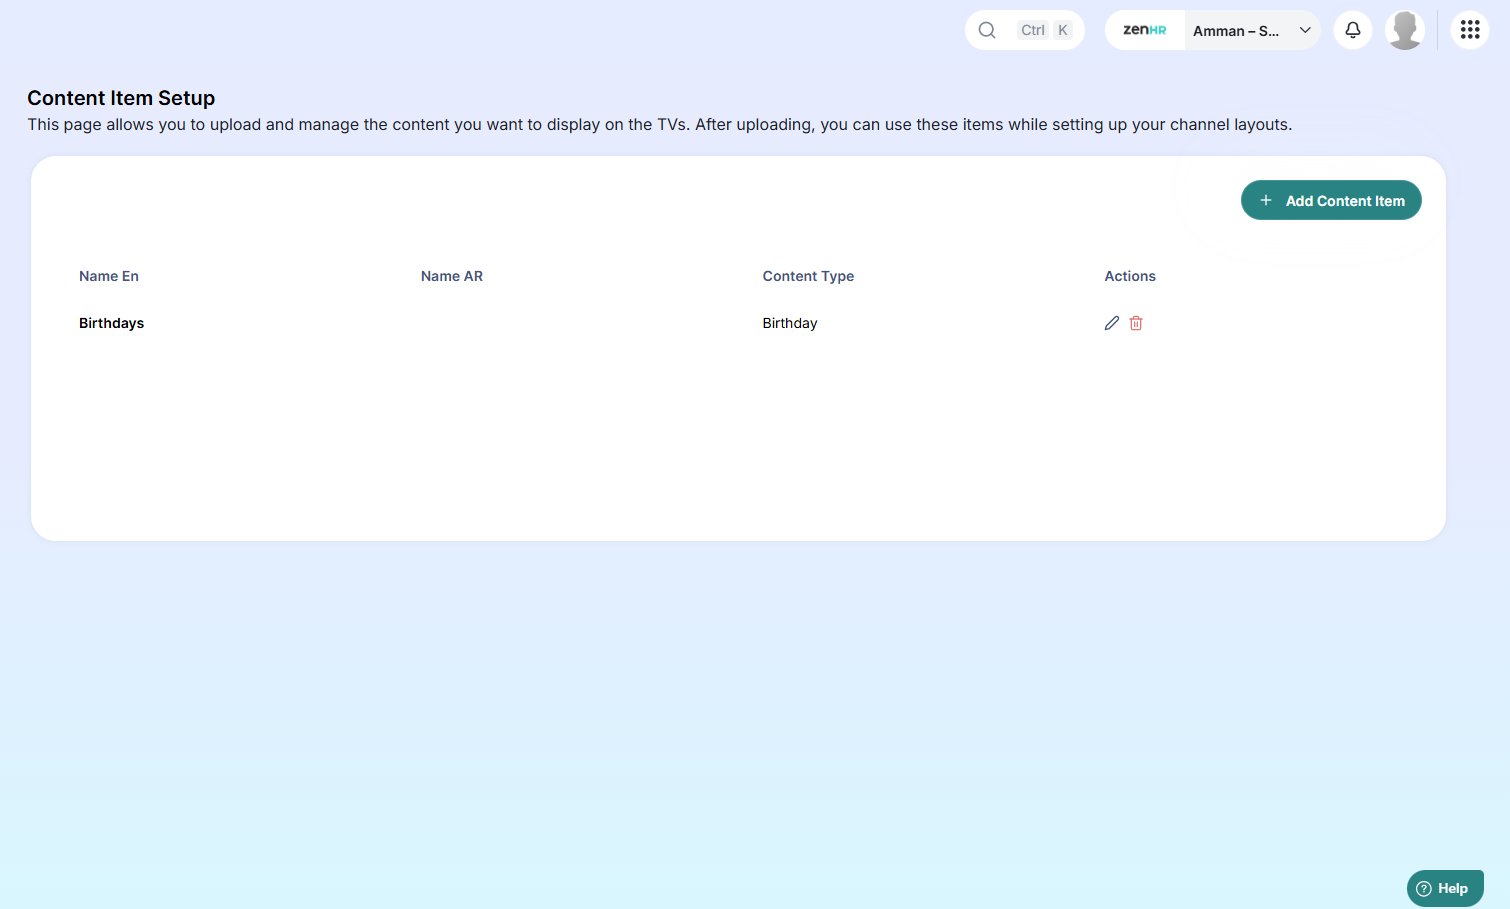
Step 2: Set Up Breaking News
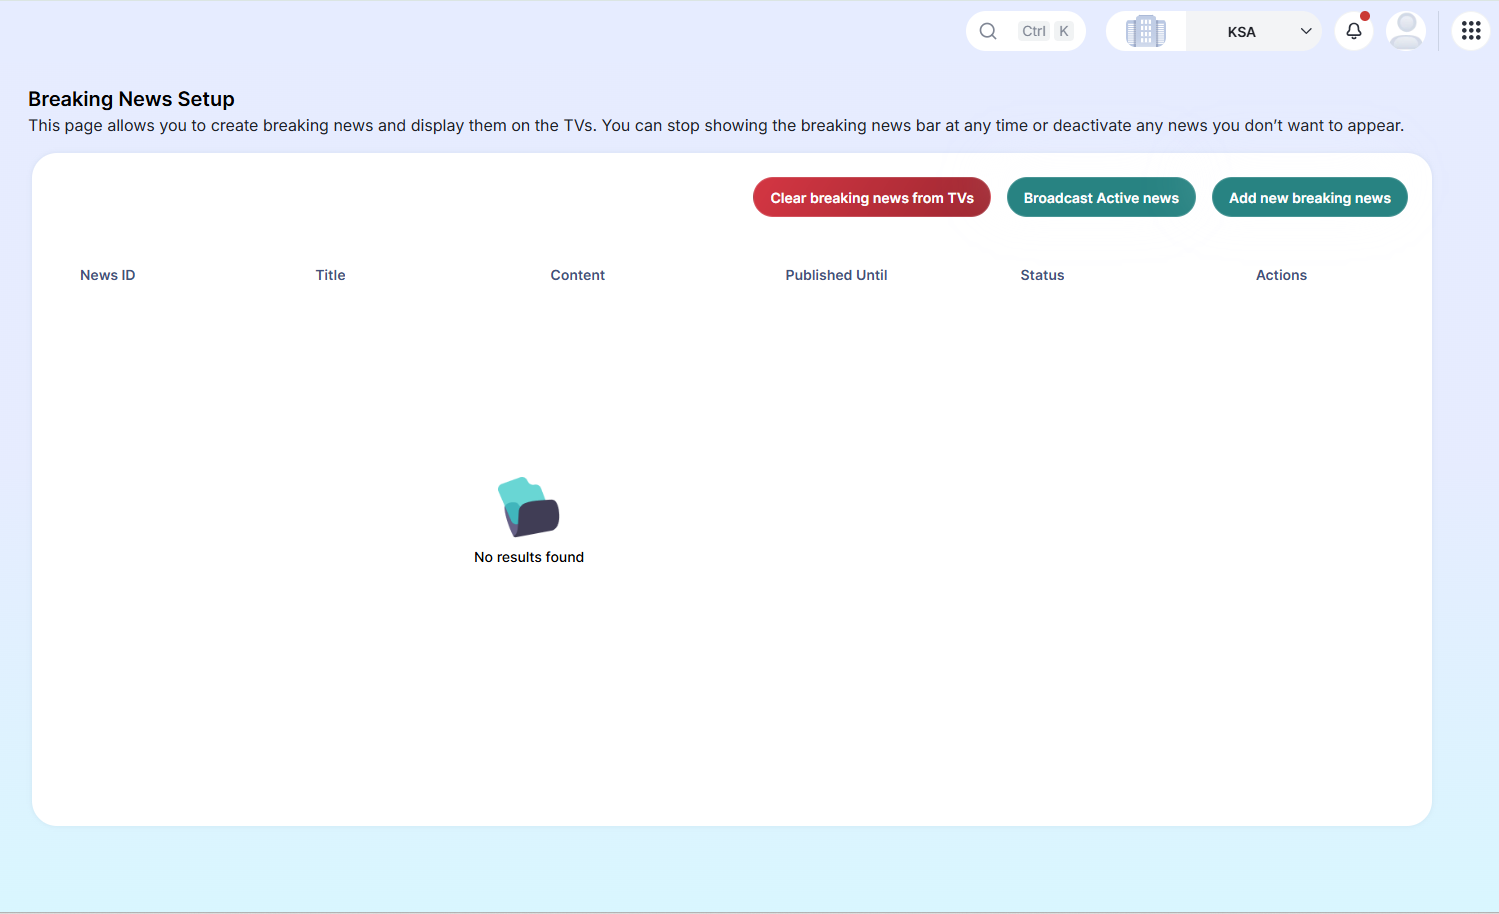
Breaking News allows you to display a short scrolling message at the bottom of your TV screens.
The message appears below the channel layout, so you can share an urgent announcement without changing the content already displayed on the screen.
You can use Breaking News for messages such as:
Urgent company announcements
Office closures
Important reminders
Event updates
Time-sensitive notices
How to Add a Breaking News Message
Go to User Menu → System Preferences → TV Management.
Open the Breaking News Setup page.
Click “Add new breaking news”.
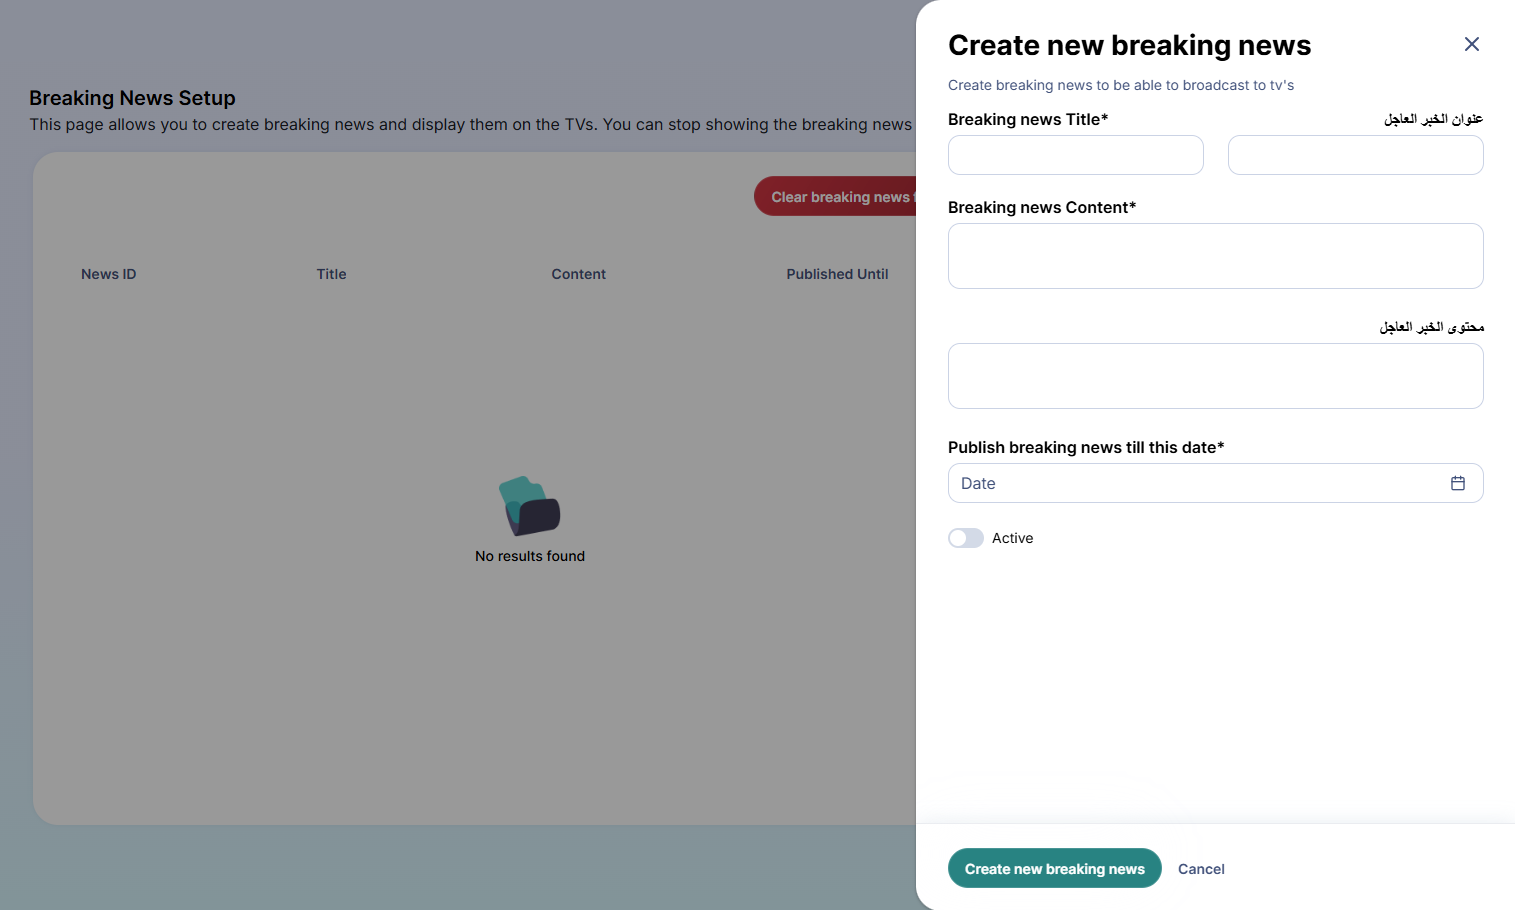
Enter the breaking news title.
Enter the breaking news content in Arabic or English.
Select the date until which the message should remain available.
Set the breaking news to “Active” if you want it to be available right away once broadcast.
Then click “Create new breaking news”.
The message will be saved and listed on the Breaking News Setup page.
How to Display Breaking News on TVs
To display the active breaking news message on all registered and active TVs:
Go to the Breaking News Setup page.
Make sure the message is set to Active.
Click Broadcast Active News.
The message will begin scrolling across the bottom of all registered and active TV screens.
How to Remove Breaking News from TVs
To remove the breaking news message from all registered and active TVs:
Go to the Breaking News Setup page.
Click Clear Breaking News from TVs.
The message will be removed without changing the channel or layout currently displayed on the TVs.
Note: Broadcasting or clearing breaking news does not affect the channel content shown on the screen.
Step 3: Register a TV Device
After adding your content items, you need to register the TV screen where the content will be displayed.
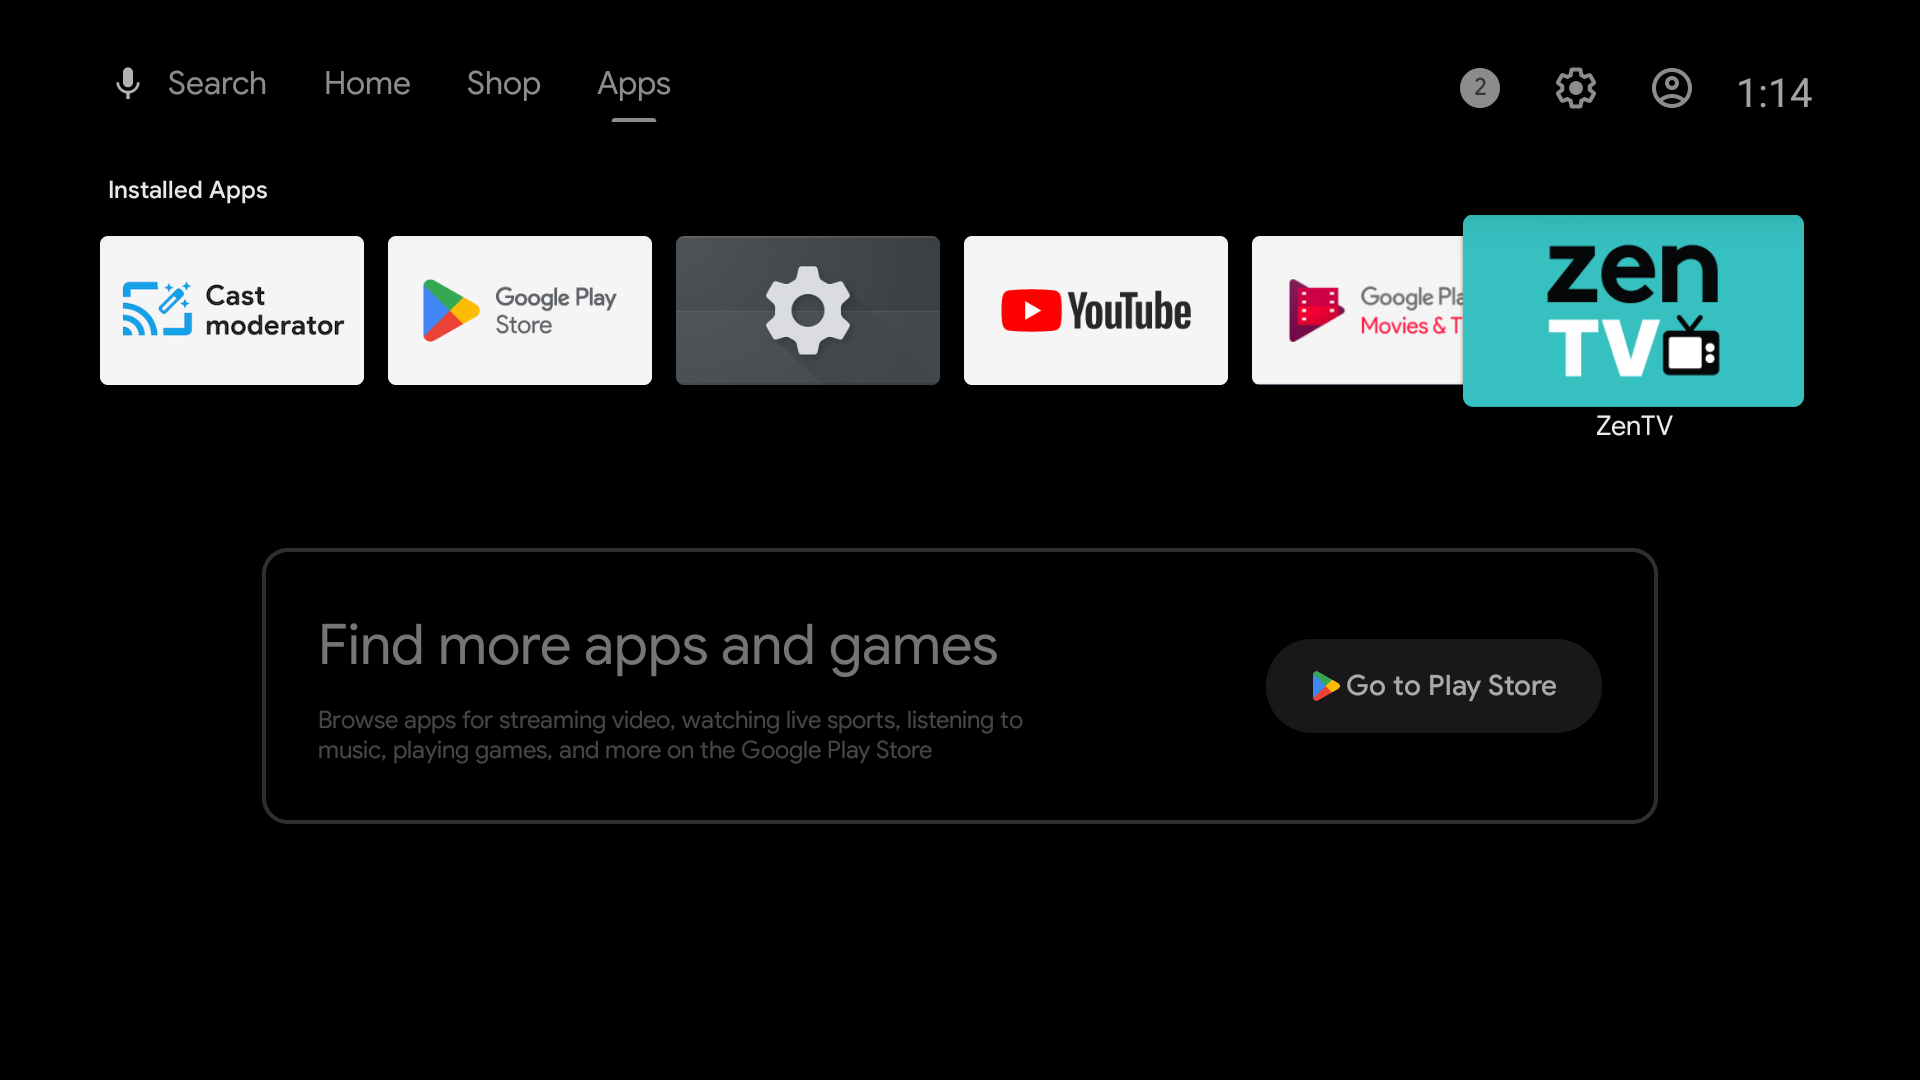
Before registering the device, make sure the ZenTV app is downloaded on the smart TV.
To register a TV:
Open the app store on your smart TV.
Search for ZenTV.
Download and open the ZenTV app.
A pairing code will appear on the TV screen.
Then on ZenHR, go to User Menu → System Preferences → TV Management.
Open the TVs page.
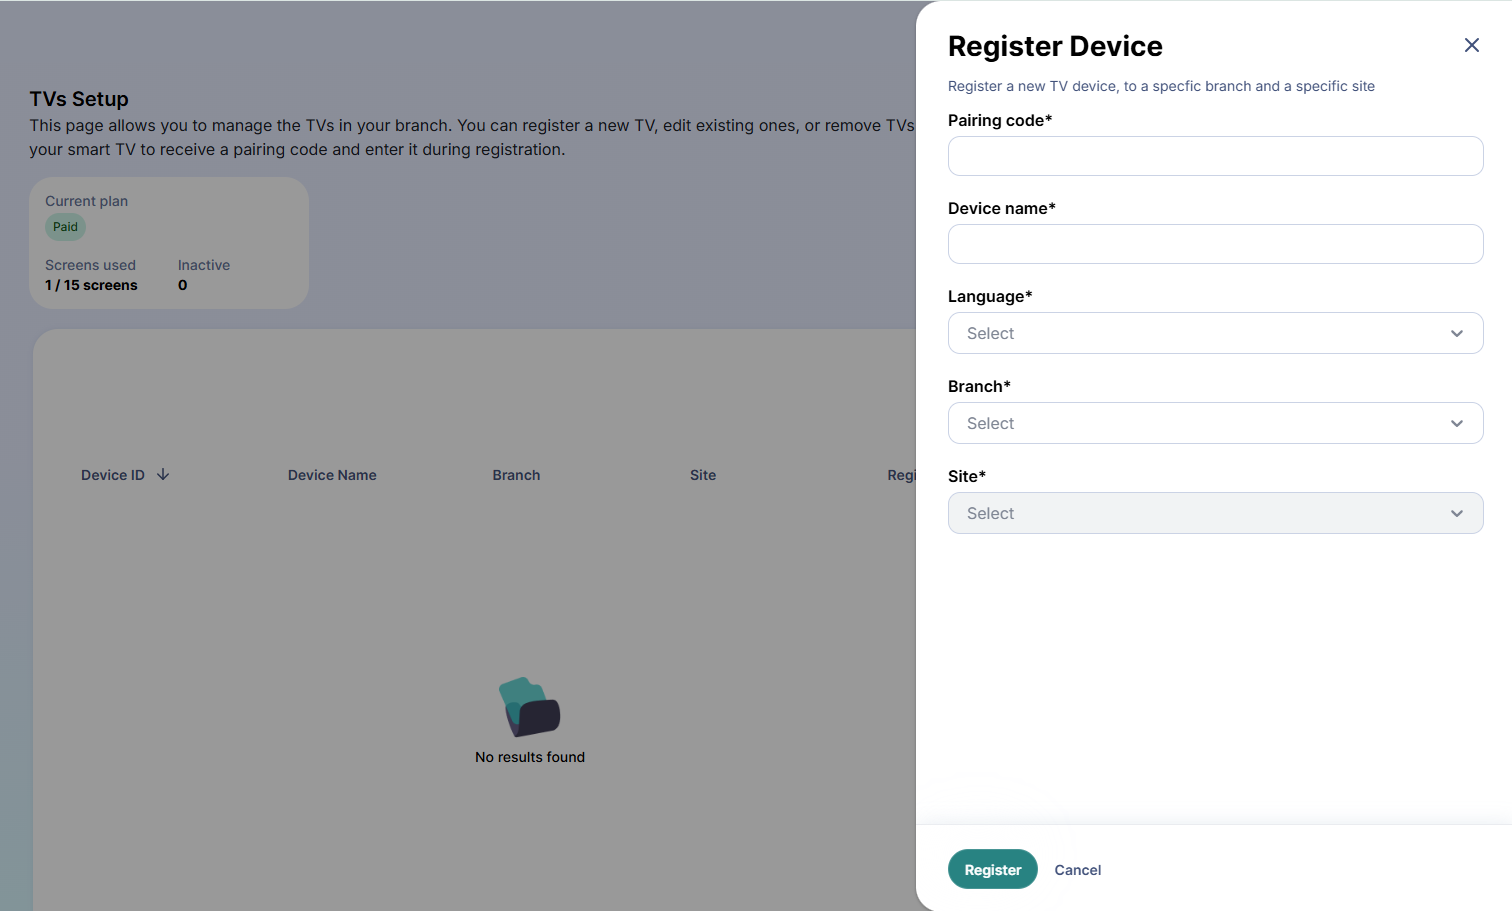
Click “Register Device”.
Enter the pairing code shown on the TV.
Add a device name.
Select the language.
Select the branch where the TV is located.
Select the site that corresponds to the selected branch.
Save the device.
Notes:
- The selected language affects the direction of the content display, such as right-to-left or left-to-right alignment.
- The selected language also controls which language version of the content items will appear on the TV.
- Each TV must be registered using the pairing code displayed inside the ZenTV app.
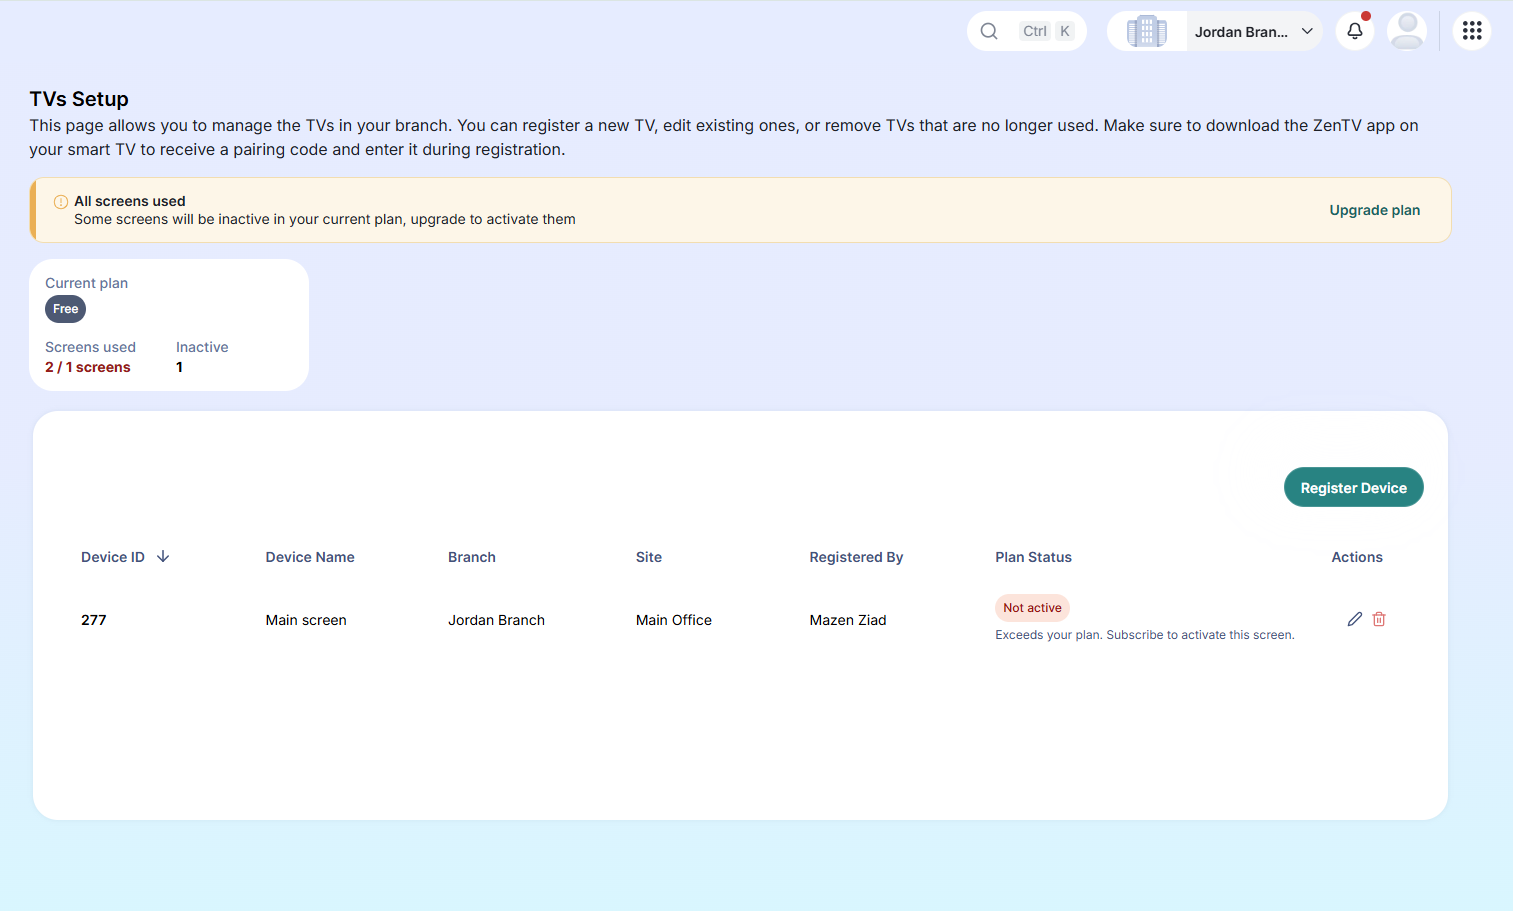
- You can edit or delete registered TV devices from the TVs page.
To add more screens, click “Upgrade Plan” to contact our Sales Team and choose the screen package that best fits your needs.
Step 4: Create a Channel
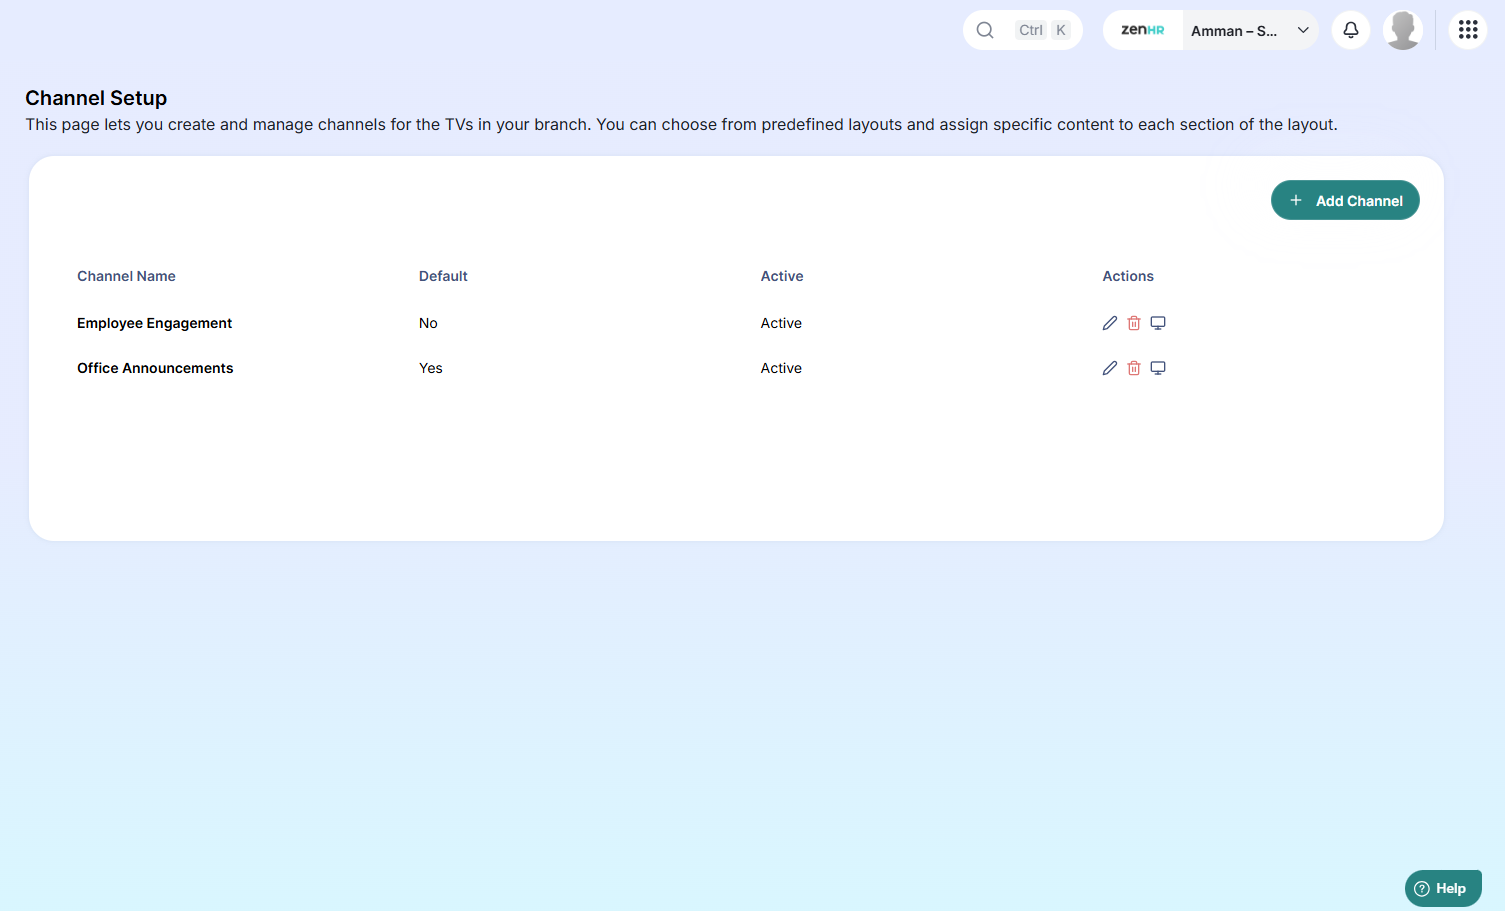
Channels are used to organize the content that appears on your TVs. For example, you can create a channel for announcements, employee recognition, attendance, or general office communication.
To create a new channel:
Go to User Menu → System Preferences → TV Management.
Open the Channel Setup page.
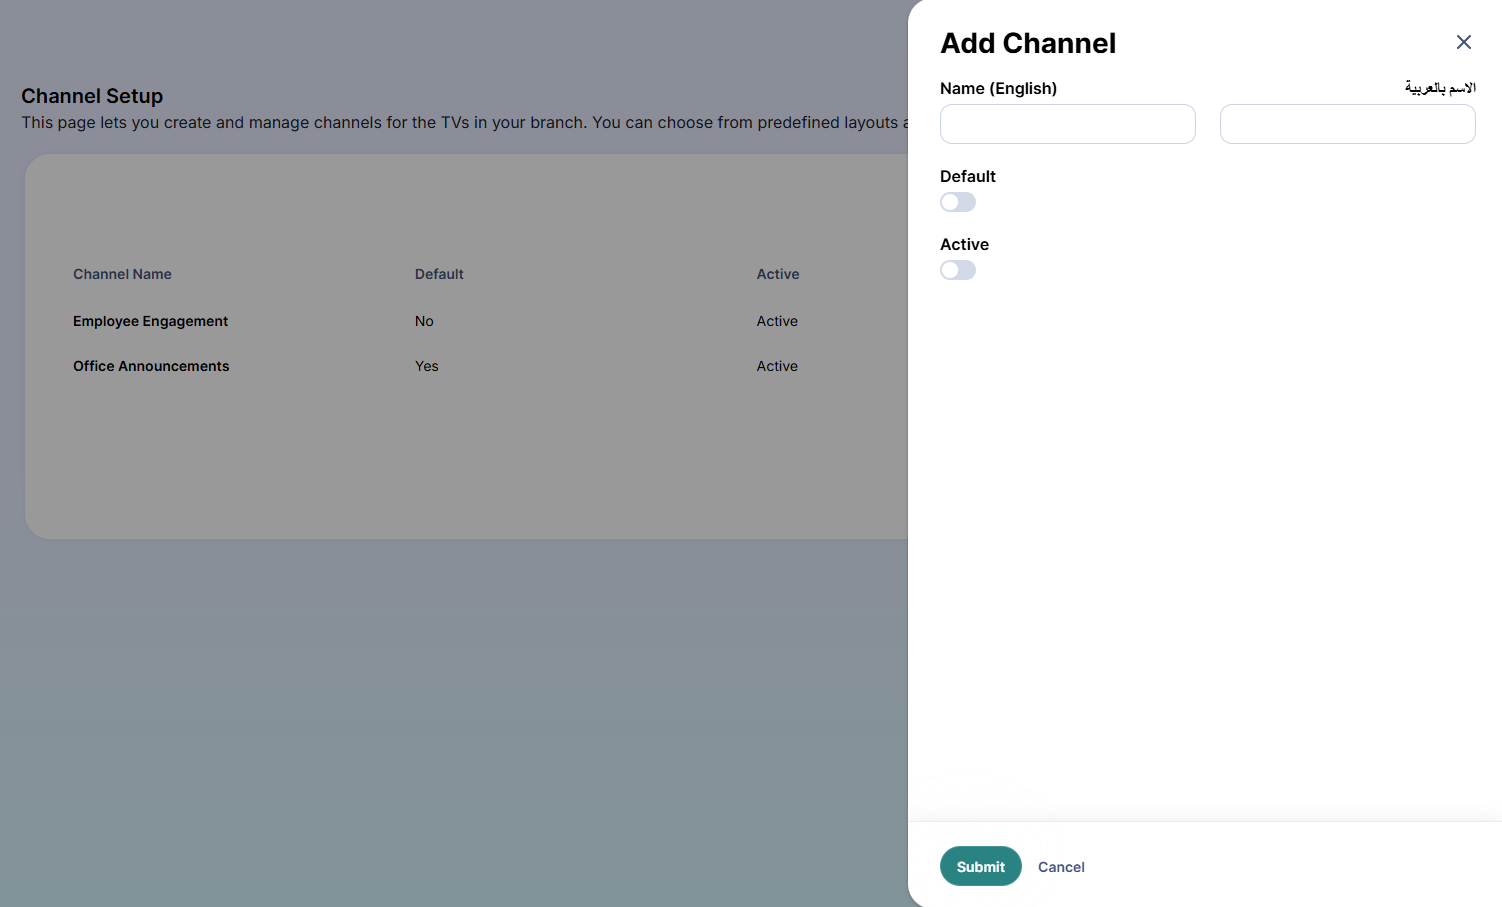
Click “Add Channel”.
Enter the channel name.
Choose whether this should be the default channel.
Choose whether the channel should be active.
Then click “Submit” to add the channel.
Channel Options
Default Channel
This is the channel that will be shown by default on the TV.
Active Channel
Only active channels can be displayed and broadcast.
From the Channel Setup page, you can also edit a channel, delete a channel, or broadcast it to your registered TVs.
Step 5: Set Up the Channel Layout
After creating a channel, you need to design the layout of the content that will appear on the TV screen.
To set up a channel layout:
Go to the Channels page.
Find the channel you want to customize.
Click the TV icon in the Actions column.
The layout editor will open.
Add the available widgets to the layout.
Drag each widget to your preferred position.
Resize widgets by dragging from the bottom-right corner.
Save the layout.
What Are Widgets?
Widgets are the content items you created earlier. For example, if you created an announcement, birthday item, photo, or attendance QR code, these will appear as available widgets that you can add to your layout.
You can also use the “+ button” inside the layout page to quickly add new content items without leaving the page.
Step 6: Broadcast the Channel
Once your channel and layout are ready, you can broadcast the channel to your TV screen.
To broadcast a channel:
Go to the Channel Setup page.
Find the channel you want to display.
Click the broadcast option from the Actions column.
Select the TV or TVs you want to display the channel on.
Confirm the broadcast.
The selected content will appear on the connected TV screens.
Step 7: Use the ZenTV App on the TV
After the TV is registered, you can manage what appears on it from ZenHR.
On the TV:
Open the ZenTV app.
Make sure the device is already registered in ZenHR.
View the available channels.
Switch between channels when needed.
Once connected, your TV will display the content assigned to the selected channel.
Final Step
Once your content items, TVs, channels, and layouts are ready, you can start sharing company updates across your workplace screens using ZenTV.
ZenTV helps your team keep employees informed, engaged, and connected, all directly from ZenHR.
Was this article helpful?
That’s Great!
Thank you for your feedback
Sorry! We couldn't be helpful
Thank you for your feedback
Feedback sent
We appreciate your effort and will try to fix the article