The Single Sign-On (SSO) integration simplifies authentication by connecting ZenHR with your organization’s Identity Provider (IdP). Once the Single Sign-On (SSO) integration is enabled, employees can access ZenHR directly using the same username and password they use across other company systems, eliminating the need to remember multiple credentials.
This feature enhances:
Security is achieved by centralizing authentication.
Convenience, by reducing password fatigue.
Efficiency is achieved by streamlining the login process.
This guide explains how to enable and configure the Single Sign-On (SSO) integration using SAML 2.0 within ZenHR. The SSO integration allows your employees to log in to ZenHR using their existing company credentials, providing a secure and convenient login experience.
Table of Contents:
How to Use the SSO Integration
Review Service Provider Details
Adding the Identity Provider (IdP) Details
Testing the SSO Connection
1. How to Use the SSO Integration
To access and enable the SSO integration:
Log in to your ZenHR Admin account.
From the main menu, on the left, go to “Marketplace Integrations”.
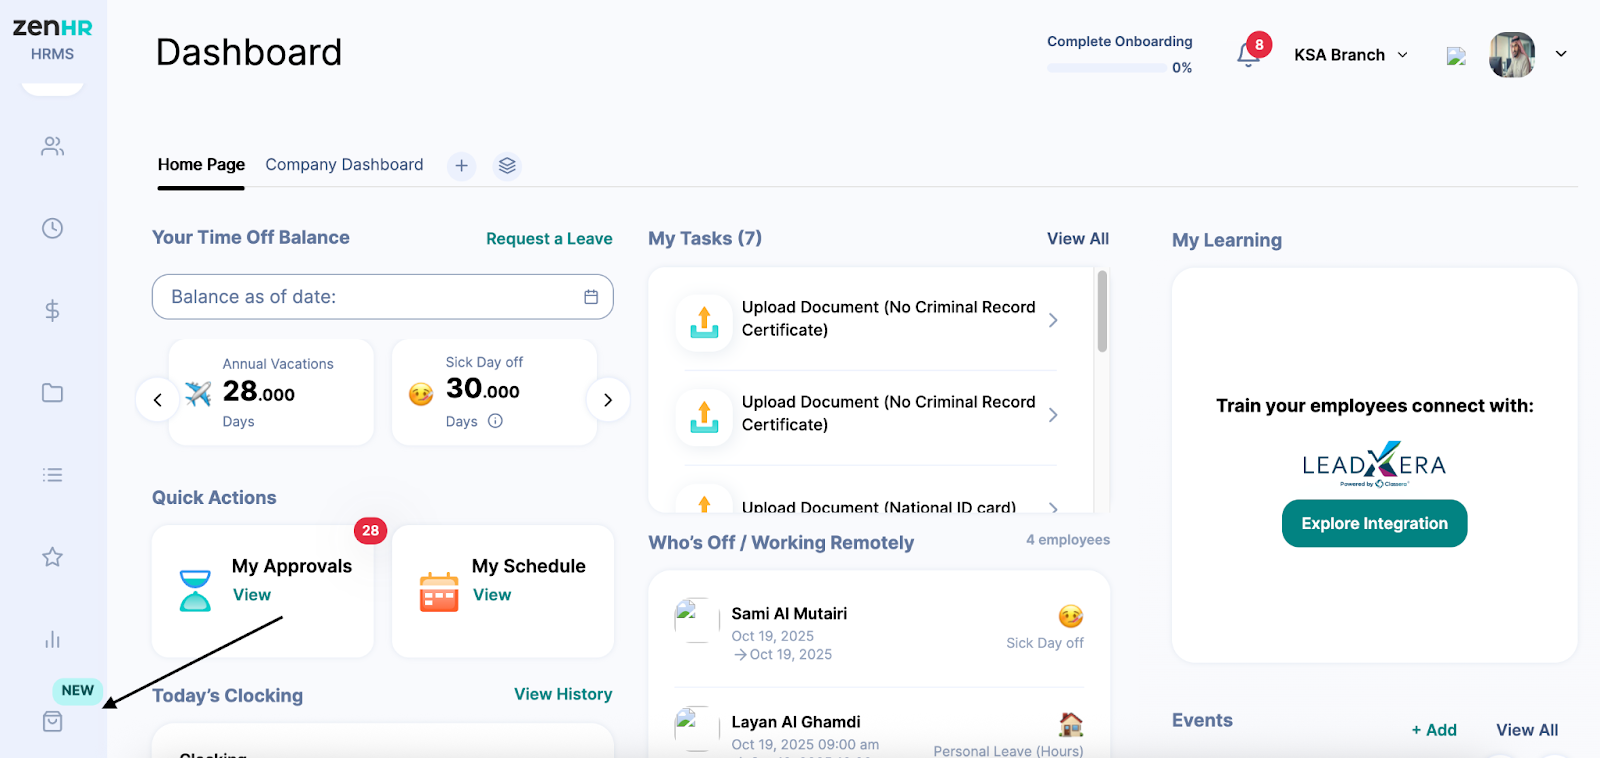
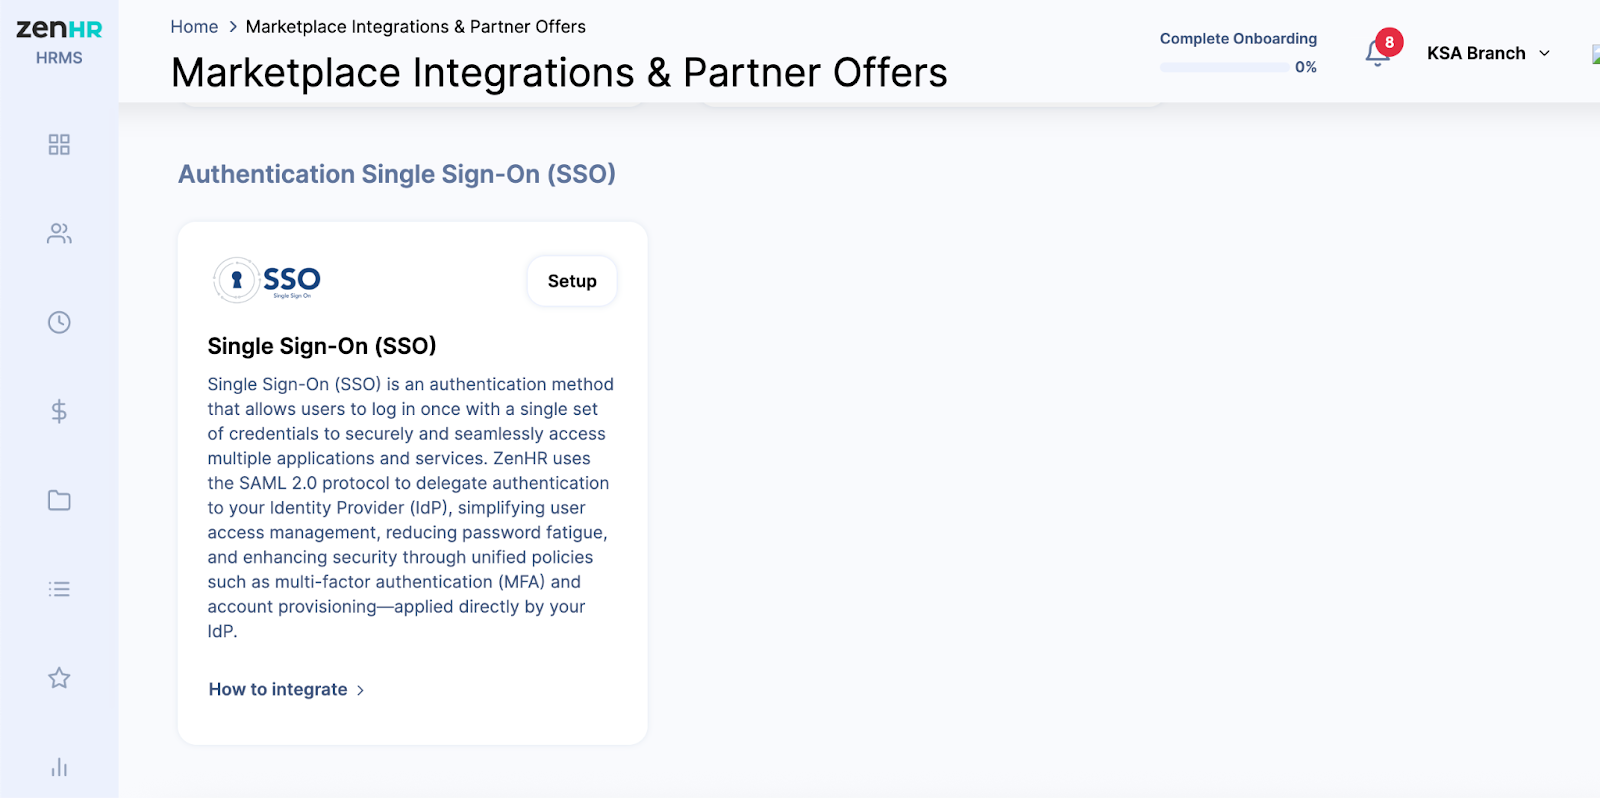
Scroll through the list or use the search bar to find “Single Sign-On (SSO) – SAML 2.0.”
Once located, click on “Setup” next to the SSO integration card.
After clicking the “Setup” button:
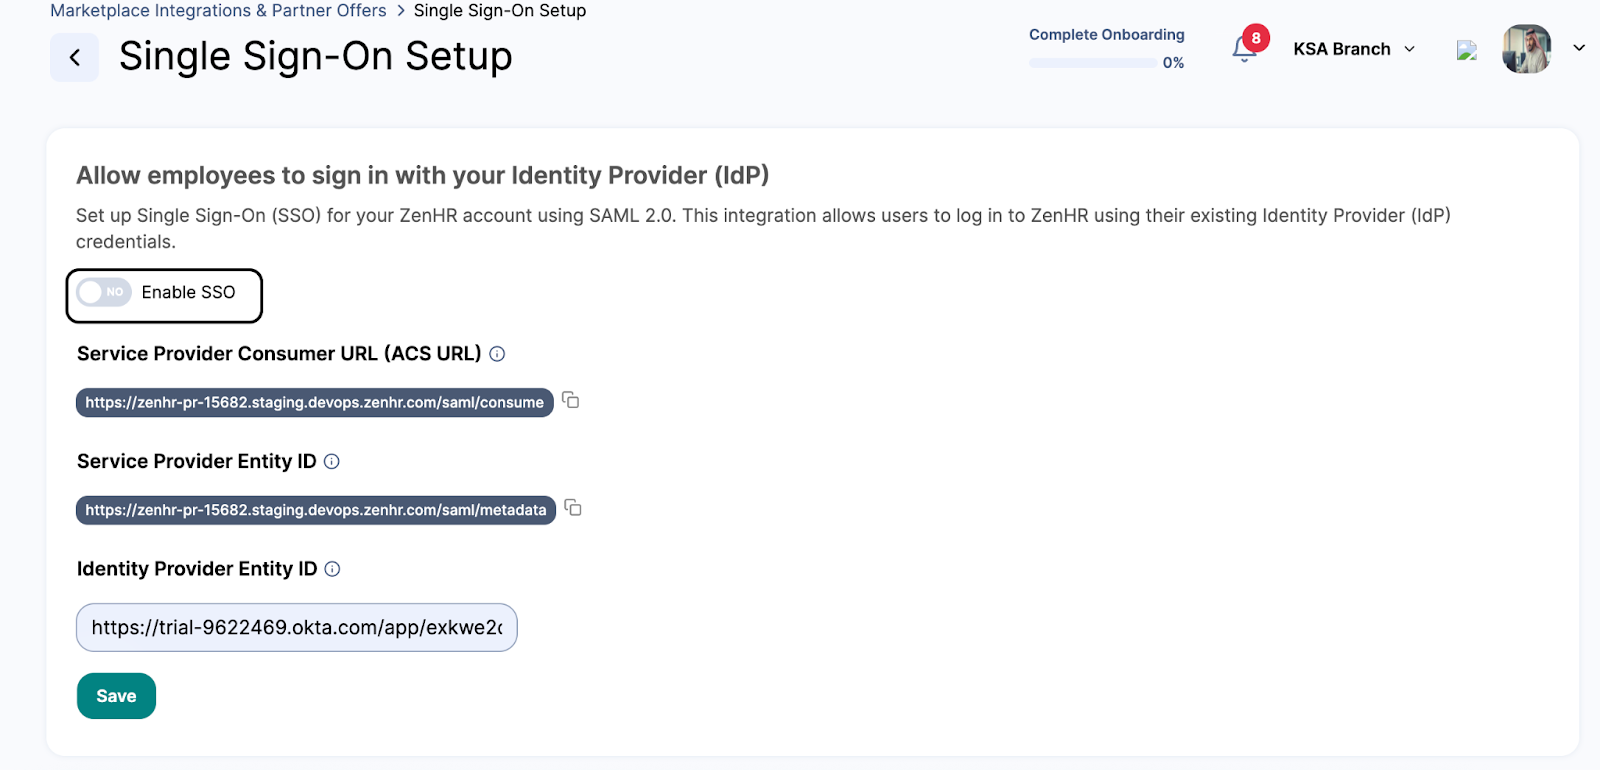
A new configuration page will open, showing the SSO (SAML 2.0) settings.
You will see an option to Enable SSO Integration.
Activate the Toggle “Enable SSO”.
2. Review Service Provider Details
After enabling SSO, you’ll see two fields automatically populated by ZenHR. These fields provide essential information required by your Identity Provider (IdP):
Service Provider Consumer URL (ACS URL)
Example:
https://app.zenhr.com/saml/consume
This URL tells your IdP where to send authentication responses.Service Provider Entity ID
Example:
https://app.zenhr.com/saml/metadata
This is a unique identifier for ZenHR as the Service Provider.
You can copy these URLs by clicking on the copy icon next to each field.
3. Add the Identity Provider (IdP) Details
To complete the setup, you need to connect ZenHR with your company’s Identity Provider (IdP). Follow these steps to do so:
Locate the field labeled Identity Provider Entity ID and Enter your company’s IdP Metadata URL depending on the available configuration option.
Verify that the entered information is correct.
Tip: If you’re not sure how to get this information, please contact your IT or system administrator - they will provide the correct IdP details.
To complete the setup, you must add your Identity Provider Entity ID (provided by your IdP).
Copy the Entity ID or Metadata URL from your IdP (e.g., Okta, Azure AD, etc.).
Paste it into the Identity Provider Entity ID field on the ZenHR setup page.
Example: https://trial-9622469.okta.com/app/exkwe2c…
Tip: If you’re not sure about this information, please contact your company’s IT team to obtain the correct details.
Review the entered information carefully.
Click on “Save” to enable the SSO integration.
A confirmation message will appear indicating that the integration was activated successfully.

4. Test the SSO Connection
After enabling the integration:
Log out of ZenHR.
Go to ZenHR’s login page.
Click on the “Login”. You will be redirected to your company’s Identity Provider (IdP) login page.
Enter your company credentials.
Once authenticated, you will be redirected back to ZenHR, logged in automatically.
If the login is successful, your SSO configuration is working correctly. If you fail to log in, please contact ZenHR’s support at support@zenhr.com.

5. Disable SSO (If Needed)
If you ever need to turn off the SSO integration:
Go back to the Single Sign-On Setup page.
Switch off the Enable SSO toggle.
Click Save to confirm.
Important Note: Disabling SSO means employees will need to log in using their ZenHR credentials again.
Your Single Sign-On (SSO) integration with ZenHR is now active. Employees can log in easily and securely using their existing company credentials.
Was this article helpful?
That’s Great!
Thank you for your feedback
Sorry! We couldn't be helpful
Thank you for your feedback
Feedback sent
We appreciate your effort and will try to fix the article